Build Your Own Dynamic NFT With Hardhat
Now that NFTs have burst into the mainstream, developers, gamers, and collectors alike are starting to explore how these unique digital assets can take on new functionalities and unlock even richer in-app dynamics. In our past tutorials, we have walked through how to use Chainlink oracles to build, deploy, and sell NFTs that are verifiably unique and that respond to real-world inputs. These dynamic NFTs are proving to be the next-generation NFTs that go far beyond static digital collectibles. Imagine an NFT that changes every time it is transferred: an artist could make a piece of art and every time someone new buys it, Chainlink VRF generates a random change that makes the artwork provably unique for that buyer.
That is exactly what we will be doing in this post: creating, deploying, and listing a dynamic NFT (dNFT) that changes in a verifiably random manner every time it is transferred. Specifically, we will be creating a spin-off of Schrodinger’s cat that switches between sleeping and attacking.
Clone the Dynamic NFT Repo
The first step is to go ahead and clone the dynamic NFT repo.
git clone https://github.com/ZakAyesh/DynamicNFT.git
cd DynamicNFT
Once this is done, go ahead and open the project in your code editor of choice. You now need to follow the instructions in the project’s readme file for setting the required environment variables (you will need to get a free account from Infura). In this tutorial, we’ll use the Rinkeby testnet on Ethereum.
export RINKEBY_RPC_URL='www.infura.io/asdfadsfafdadf'
export PRIVATE_KEY='abcdef'
You can also add your environment variables to a .env file if you’re unfamiliar with environment variables.
RINKEBY_RPC_URL='www.infura.io/asdfadsfafdadf
PRIVATE_KEY='abcdef'
Understand the Smart Contract Logic
Go to the contracts folder and open the file named dNFT.sol. Once there, you will notice a couple of things. First, we inherit from OpenZeppelin’s ERC721 contract and Chainlink’s VRFConsumerBase. We then have storage variables for the VRF, which will be initialized in our constructor.
//State variables to store needed info for VRF
bytes32 internal keyHash;
uint32 internal fee;
Next, we begin defining all the state variables we need for our dNFT. These can be different for your own dNFT, but you can use these as a reference.
uint256 public tokenCounter;
enum EigenValue {HESLEEP, HEATTAC, SUPERPOSITION}
string[] IpfsUri = [ .... ];
mapping(uint256 => EigenValue) public tokenIdToEigenValue;
mapping(bytes32 => uint256) public requestIdToTokenId;
The token counter keeps track of each dNFT we mint. EigenValue is an attribute of our dNFT we want to keep track of on-chain, IpfsUri is an array with all URI’s for each mutation of the NFT, and tokenIdToEigenValue keeps track of what EigenValue each NFT is. Since Chainlink VRF is asynchronous, we use a requestIdToTokenId to map all Chainlink VRF requests to the token we are transferring. EigenValue could be changed into any kind of attribute you want to keep track of on-chain: colors, size, name, etc (note that for this tutorial the on-chain attributes aren’t actually affecting the NFT, but it’s cool to have more immutable info describing the NFT stored on-chain).
Next is the createCollectible function, which creates our dNFT and initializes it to an initial attribute (an initial EigenValue in this case). The URI that corresponds with that attribute. The last thing the function does is increase the token counter by 1.
function createCollectible() public {
    uint256 newItemId = tokenCounter;
    string memory initialUri = IpfsUri[2];
    EigenValue initialEigenVal = EigenValue(2);
    _safeMint(msg.sender, newItemId);
    _setTokenURI(newItemId, initialUri);
    tokenIdToEigenValue[newItemId] = initialEigenVal;
    tokenCounter = tokenCounter + 1;
}
Next, there is the transferFrom function which actually calls the VRF when it is invoked. To do this, we override the OpenZepplin ERC-721 transferFrom function to add in our new logic. The function then calls the VRF using the block number as our provided seed and records our request in the mapping. Because the block data is unknown when the request is made, Chainlink VRF ensures that the randomness informing NFT and in-game outcomes is tamper-proof and unpredictable.
function transferFrom(address from, address to, uint256 tokenId) public override(ERC721) {
    bytes32 requestId =
        requestRandomness(keyHash, fee, uint32(block.number));
    requestIdToTokenId[requestId] = tokenId;
    _transfer(from, to, tokenId);
}
Finally, we have the fulfillRandomness method which is called by the Chainlink VRF after a transfer is completed. We take the random number moduleo to 2 to get either a 0 or a 1. We will use this to switch to either the first or second attribute (this cat doesn’t revert back into a superposition) and switch to our corresponding URI.
function fulfillRandomness(bytes32 requestId, uint256 randomNumber) internal override
{
    uint256 _tokenId = requestIdToTokenId[requestId];
    uint256 random2 = (randomNumber % 2);
    EigenValue newEigenVal = EigenValue(random2);
    string memory newUri = IpfsUri[random2];
    tokenIdToEigenValue[_tokenId] = newEigenVal;
    _setTokenURI(_tokenId, newUri);
}
Just like that, we have a contract that lets us create dynamic NFTs that change every time they are transferred.
Check Out the Metadata
In this tutorial, we will be using off-chain metadata (because OpenSea currently only reads off-chain) stored on IPFS. If you would like a review of metadata, please check out the “What is Metadata?” and “Downloading IPFS” sections of our last dynamic NFT tutorial. There are some pre-built metadata files within the repo already in the “metadata” folder, which point to files that have been hosted on IPFS. If you are making your own, feel free to host your own images and change the metadata to point to them. Just remember to change the URIs listed in the smart contract.
Deploy the Contract to Rinkeby
Now we will use Hardhat to deploy the contract to the Rinkeby testnet, as that is the only Ethereum testnet that OpenSea currently recognizes. All deploy scripts are in the deploy folder within the repo. Hardhat will automatically check there when the deploy command is given. We need to install dependencies and then deploy
yarn install
npx hardhat deploy
Once that is run, you should see the address of the contract you just deployed along with several Hardhat commands you can run. For example:
Compiling 18 files with 0.6.7
Compilation finished successfully
----------------------------------------------------
Deploying dNFT
dNFT deployed to:  0x472fd0039FDD02BcA13a34DaBa788ed1e82bb9A6
Run the following command to fund contract with LINK:
npx hardhat fund-link --contract  0x472fd0039FDD02BcA13a34DaBa788ed1e82bb9A6
Then create a dNFT with the following command:
npx hardhat create-collectible --contract  0x472fd0039FDD02BcA13a34DaBa788ed1e82bb9A6
Create a Dynamic NFT
One of the most valuable parts of Hardhat for this build is its customizable “tasks”. These can be found in the “tasks” folder and are all imported into the “hardhat.config.js” file where they are read from. Hardhat tasks always begin with the keyword “task” and are fed the task name and description as arguments. The first task we will be using is the create-collectible task, which calls the create-collectible function on our deployed smart contract. To use the create-collectible task, run the following command in your terminal (adding in your contract’s address):
npx hardhat create-collectible --contract INSERT_YOUR_CONTRACT_ADDRESS_HERE
Congratulations, you now have your first dNFT! If you are using the provided code as is, you will always start with a cat in a box, stuck in a superposition of sleeping and attacking.
Fund Your Contract With LINK
LINK is needed to pay the Chainlink VRF for its service. VRF is called any time we transfer the adequate LINK fee to the VRF contract address. So, before we can sell our NFT, which is just a transfer with conditions handled by the listing platform, we need to fund the contract we created with LINK or the transfer will fail. To fund the contract with Rinkeby testnet LINK, run the following command in your terminal:
npx hardhat fund-link --contract INSERT_YOUR_CONTRACT_ADDRESS_HERE
Test Selling Your Dynamic NFT
To test listing your NFT for sale (it’s on the Rinkeby testnet, so it won’t be bought with real ETH), go to https://testnets.opensea.io/account and sign in with the MetaMask account you used to create the dNFT. Click on your account in the top right corner and go to “My Profile”. You should see an NFT of a box! Note that OpenSea could take upwards of an hour to upload the data.
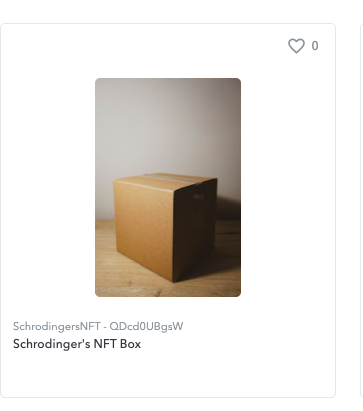
Don’t worry if you don’t see the box right away. You may have to wait some time for OpenSea to load all the metadata and image from IPFS. Once your NFT is fully displayed, click on it and you can click on the blue “Sell” button on the top right of your screen to list the NFT under whatever conditions you would like.
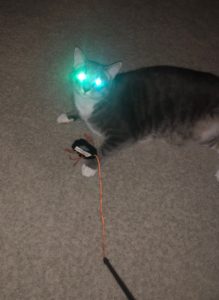
You may want to leave a disclaimer to whoever buys your NFT that it may change once they receive it (there is already a disclaimer included in the metadata of the box)! Once someone buys the NFT, it will transfer to them, Chainlink VRF will be called, and the eigenvalue+URI will switch to either “Attack Cat” or “Sleeping Cat”. The buyer may need to click “update metadata” on OpenSea after the NFT is transferred so it knows to look for the new metadata. Updating the metadata could take some time (upwards of an hour) as we need to wait for Chainlink VRF’s transaction to be included in the blockchain and for OpenSea to refresh the frontend to reflect the new metadata. Once the transfer is complete and the metadata has been updated, you should see either an “Attack Cat” or “Sleeping Cat”! Here’s a sneak peek of “Attack Cat”. Try selling/transferring the dNFT and you may get to see “Sleeping Cat”!
Next Steps
In this article, we have learned how to create truly dynamic NFTs, deployed them using Hardhat, and listed them on OpenSea’s peer-to-peer marketplace. This is only scratching the surface of what’s possible with dNFTs. One project that would be cool would be to make NFTs that have verifiably random traits when they are minted and that also dynamically change when they are transferred! The point is, there’s still a lot of exploring to do when it comes to the emerging NFT ecosystem, and Chainlink VRF is a powerful tool to take into that new frontier.
If you learned something new here, want to show off what you’ve built, or developed a frontend for some of the demo repos, make sure you share it on Twitter, Discord, or Reddit, and hashtag your repos with #chainlink. Also stop by our Discord and share any other cool NFTs you have created.
As always, be sure to visit the developer documentation to explore Chainlink’s wide range of oracle functions. You can also subscribe to the Chainlink Newsletter to stay up-to-date with everything in the Chainlink stack.


