How to Use Chainlink With Hardhat
Hardhat is fast becoming the development environment of choice for many Ethereum developers, thanks to its focus on automation and recurring tasks, as well as its built-in local Ethereum network. In this technical article, we’ll show you how to use Hardhat to build, deploy, and interact with three different types of smart contracts that make use of the Chainlink Network:
- API Consumer contract that fetches external data
- Price Feeds Consumer contract that reads the latest price from a Chainlink Price Feed
- VRF Consumer contract that requests a random number using Chainlink VRF
Overview and Prerequisites
Hardhat is a development environment for Ethereum developers that helps manage and automate recurring tasks. Tasks are simple repeatable functions that contain certain metadata, such as what parameters the task requires. An example of a task is funding a deployed contract with some ETH or other token.
Hardhat also comes with its own local development network called the Hardhat Network, which focuses on Solidity debugging and additional logging, as well as giving developers a local development environment that’s ideal for developing and refining code.
A lot of Hardhat’s functionality comes from plugins, which are essentially tasks or external bits of code that are injected into a project. Two popular Hardhat plugins are the web3 and ethers.js plugins, both of which give the developer access to interact with an Ethereum network.
In our source code, we’ve created a ‘Chainlink Hardhat Box’, which is basically a Hardhat project that contains all the tasks and smart contracts needed to implement and deploy the main features offered by the Chainlink Network today in your Solidity smart contracts.
The first step is to download the source code of the Chainlink Hardhat box and install the required dependencies:
git clone https://github.com/smartcontractkit/hardhat-starter-kit/
cd hardhat-starter-kit
npm install
Once this is done, you need to follow the instructions in the project’s readme file for setting the required environment variables. In this tutorial, we’ll use the Kovan testnet. Now you’re ready to deploy the smart contracts.
Deploying the Smart Contracts
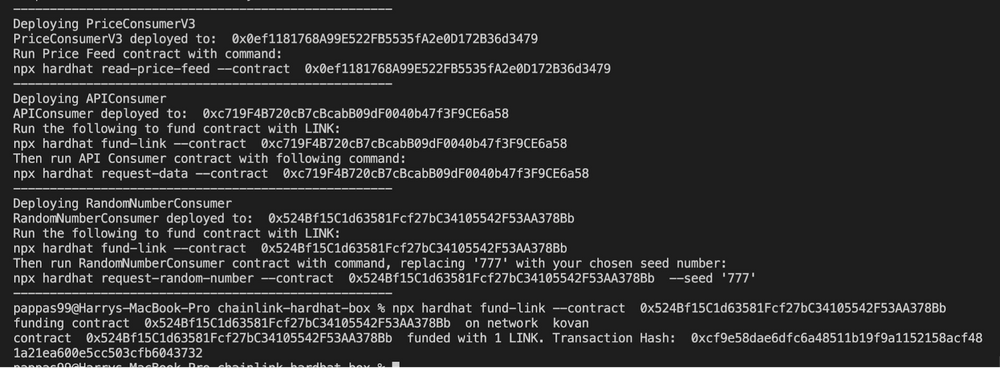
The Chainlink Hardhat Box comes with three smart contracts, as specified at the top of this article. You can deploy all three, or just a subset of them. To choose which contracts to deploy and to set the required environment specific parameters, the appropriate modifications can be made to the deploy scripts. If you leave everything as is, it will deploy all three contracts to the Kovan network using the default values. In our examples below, we’ll go through and use the default values in the project.
To deploy our smart contracts to the Kovan network, we will make use of the hardhat-deploy plugin, which is a Hardhat plugin for replicable deployments and tests. To deploy the contracts we run the following:
npx hardhat deploy

Running Hardhat Tasks
Now that our smart contracts are deployed, we will make use of Hardhat tasks to interact with our deployed contracts.
Using Chainlink Price Feeds
The Price Feeds consumer contract has a read-price-feed task, to read the latest price of a specified Price Feed. If the default value in the deployment was used, it will look up the price of the ETH/USD price feed on Kovan.
npx hardhat read-price-feed --contract 0x0ef1181768A99E522FB5535fA2e0D172B36d3479

Requesting External Data
The API Consumer contract has two tasks, one to request external data based on a set of parameters, and one to check to see what the result of the data request is. This contract needs to be funded with LINK first:
npx hardhat fund-link --contract 0xc719F4B720cB7cBcabB09dF0040b47f3F9CE6a58

Once it’s funded, you can request external data by passing in a number of parameters to the request-data task. The contract parameter is mandatory, the rest are optional
npx hardhat request-data --contract 0xc719F4B720cB7cBcabB09dF0040b47f3F9CE6a58

Once you have successfully made a request for external data, you can use the read-data task to read the returned result from the Chainlink oracle.
npx hardhat read-data --contract 0xc719F4B720cB7cBcabB09dF0040b47f3F9CE6a58

Using Chainlink VRF
The VRFConsumer contract has two tasks, one to request a random number, and one to read the result of the random number request. This contract needs to be funded with LINK first:
npx hardhat fund-link --contract 0x524Bf15C1d63581Fcf27bC34105542F53AA378Bb

Once it’s funded, you can perform a VRF request with the request-random-number task, passing in a required seed number:
npx hardhat request-random-number --contract 0x524Bf15C1d63581Fcf27bC34105542F53AA378Bb --seed '777'

Once you have successfully made a request for a random number, you can use the read-random-number task to read the verified random number returned by the Chainlink oracle.
npx hardhat read-random-number --contract 0x524Bf15C1d63581Fcf27bC34105542F53AA378Bb

Summary
Hardhat is a development environment that allows Ethereum developers to quickly implement Chainlink oracles into their smart contracts, enabling them to easily deploy and test them via the use of repeatable predefined tasks.
If you’re a developer and want to connect your smart contract to off-chain data and systems, visit the developer documentation and join the technical discussion on Discord. If you want to schedule a call to discuss the integration more in-depth, reach out here.
- How to Fetch the Current Price of Cryptocurrencies in Solidity
- Random Number Generation in Solidity
- APIs, Smart Contracts, and How to Connect Them
Website | Twitter | Reddit | YouTube | Telegram | Events | GitHub | Price Feeds | DeFi
