Build, Deploy, and Sell Your Own Dynamic NFT
Non-Fungible Tokens (NFTs) are tools that are simply not found outside the blockchain space, allowing for a wide range of applications and possibilities. Building a dynamic and randomized NFT is a great start for those looking to get into building collectibles, independent tokens, tickets, gaming applications, or anything the ERC721 token standard allows for. But what can we do with it now? Wouldn’t it be awesome to show off your newly minted randomized or dynamic characters?
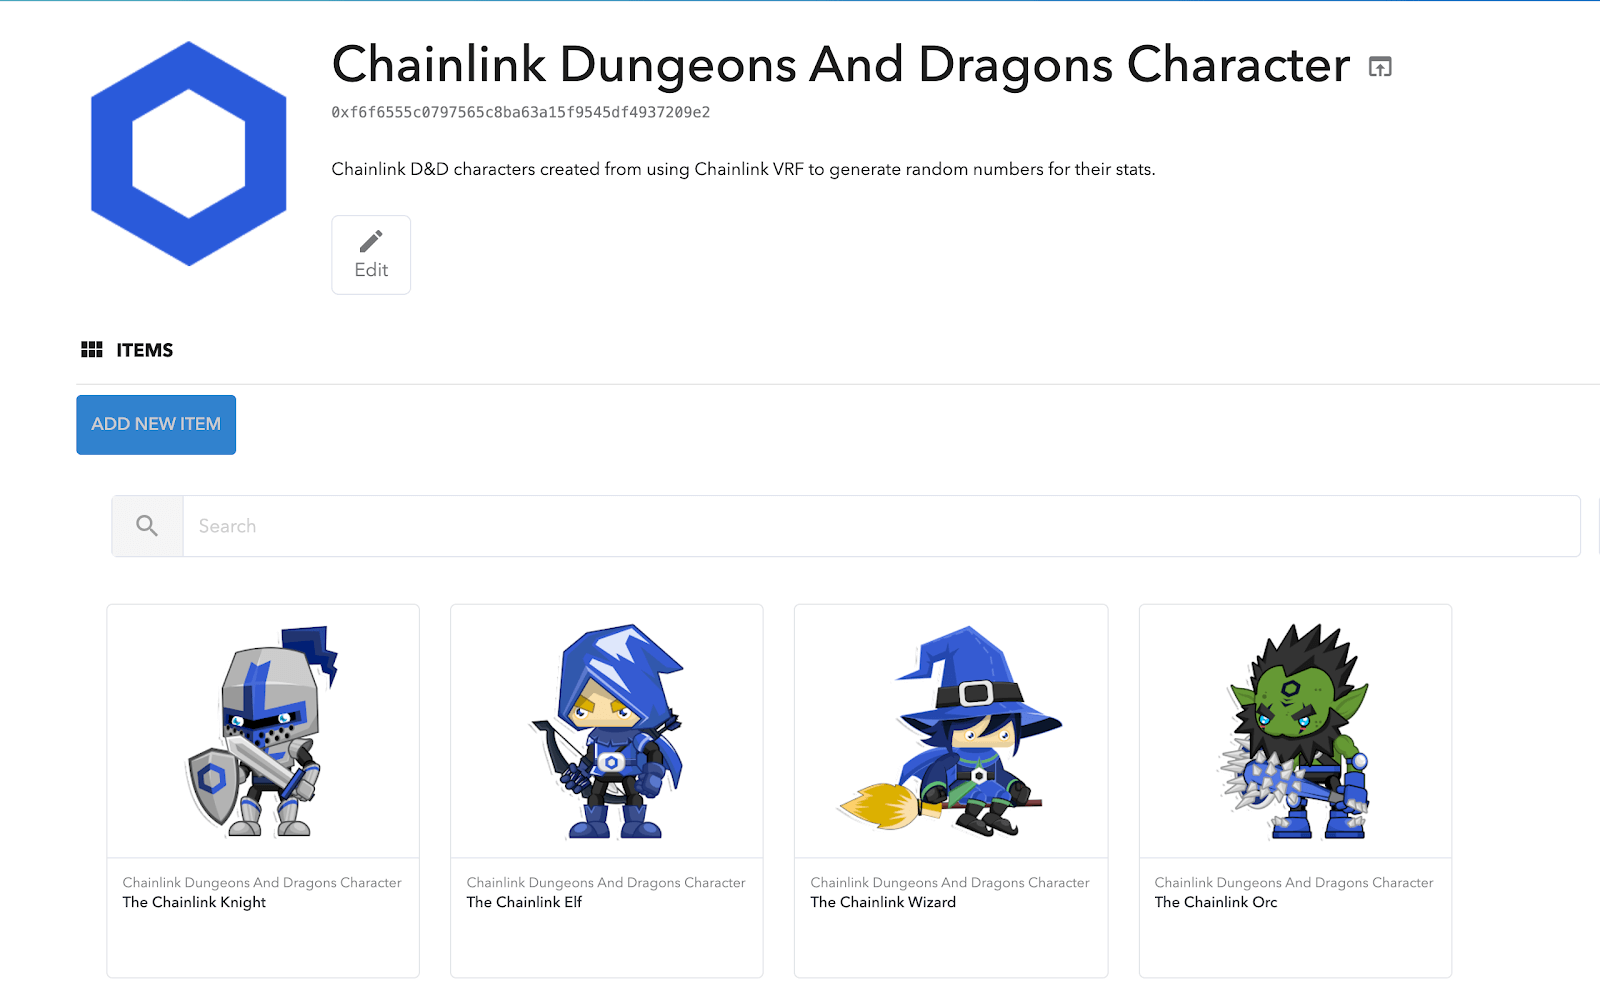
We think it would be too. In this tutorial, we will walk you through all the steps to deploy your own dynamic or randomized NFT to the OpenSea marketplace. Here is an example of what it’ll look like at the end.
Quick NFT Refresher
ERC721 (also known as NFTs) define a framework for making tokens that are unique and different from each other (hence the term non-fungible), while the popular ERC20 standard defines tokens that are “fungible”, meaning the tokens are all interchangeable and guaranteed to have the same value. We will be diving a little deeper into how to build these and how the community represents them across platforms. You can read more in the OpenSea NFT Bible as well.
If you haven’t checked out the last article on getting random numbers in an NFT, make sure you head back over there and take a look! The Developers tab is chock-full of tutorials, guides, and how-tos on various smart contract and blockchain engineering teachings.
What Is Metadata?
In our last blog, we learned how to build random NFTs. Now we are going to take it to the next level using another important piece with the ERC721 standard: metadata.
All NFTs have what’s called metadata. You can read about this in the original ERC/EIP 721 proposal. Basically, what the community found out was that storing images is really taxing and expensive to do on Ethereum. If you want to store a 8 x 8 picture, storing this much data is pretty cheap, but if you want a picture with decent resolution, you’ll need to spend a lot more.
The cost of data storage is (about) 640k gas per Kb of data. If the current gas price is approximately 50 Gwei or 0.000000050 ETH, and 1 ETH equals $600 presently, you’ll be spending $20.
$20 to add that to the blockchain. This didn’t really excite NFT creators.
We are aware that Ethereum 2.0 will solve a lot of these scaling headaches (also CONGRATULATIONS TO Eth 2.0 FOR A SUCCESSFUL LAUNCH), but for now, the community needed a standard to help with this. Metadata is this help.
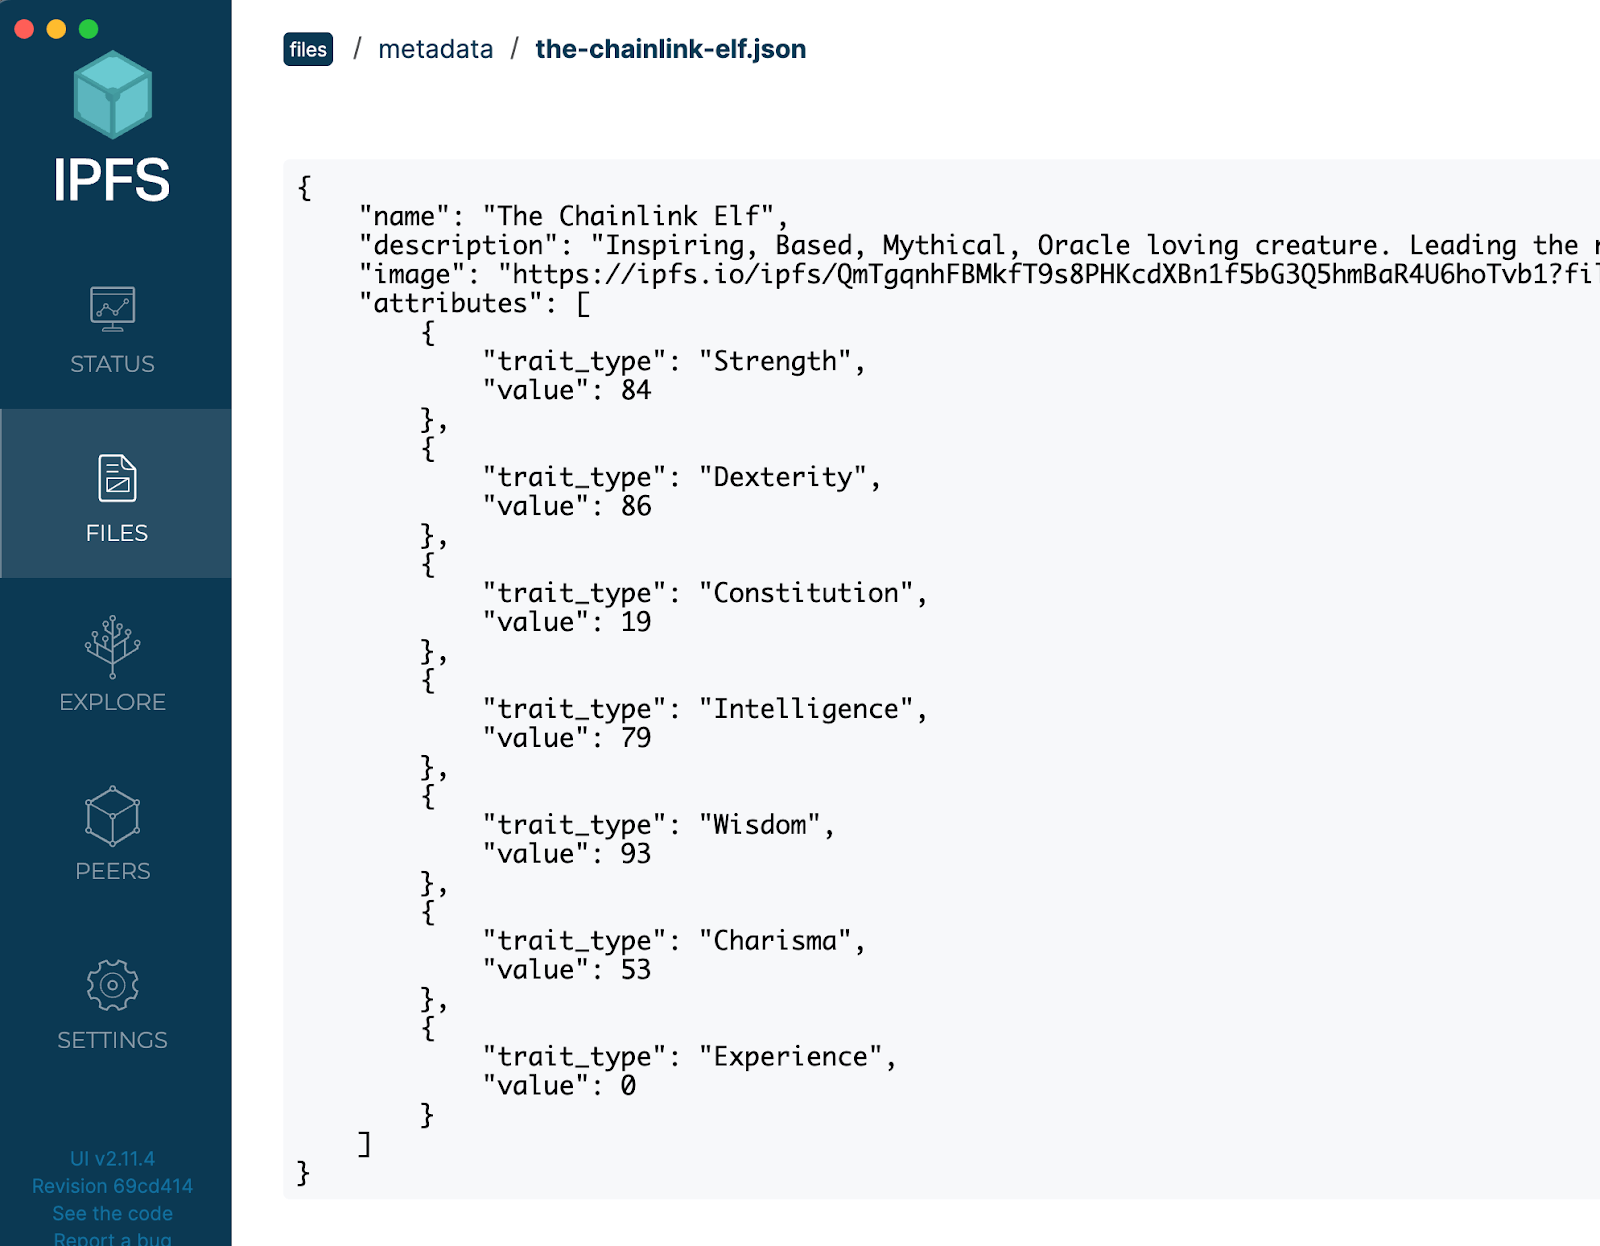
Metadata provides descriptive information for a tokenId that is stored off-chain. These are simple APIs that off-chain UIs call to gather all the information about the token. Each tokenId has a specific tokenURI that defines this API call, which returns a JSON object that looks something like this:
{
    "name": "You NFT token name",
    "description": "Something Cool here",
    "image": "https://ipfs.io/ipfs/QmTgqnhFBMkfT9s8PHKcdXBn1f5bG3Q5hmBaR4U6hoTvb1?filename=Chainlink_Elf.png",
    "attributes": [. . .]
}
You’ll notice the metadata has four distinct keys.
- name which defines the tokenIds human-readable name
- description which gives some background information on the token
- image which is another URI to an image
- attributes which allow you to display the stats of your token
It’s important that if your NFT interacts with other NFTs to make sure that the attributes on the tokenURI match the attributes of your NFT smart contract, otherwise you may get confused when battles or interactions don’t pan out as expected!
Once we’ve assigned out tokenIds to their tokenURI, NFT marketplaces will be able to display your token, allowing you to show off your creativity. You can see the one we created using the updated Dungeons & Dragons random NFT repo on the OpenSea marketplace on the Rinkeby testnet. There are many of these marketplaces like Mintable, Rarible, and OpenSea.
On-Chain and Off-Chain Metadata
You can always store all your metadata on-chain (in fact, that’s the only way for your tokens to interact), but a lot of NFT marketplaces don’t know how to read on-chain metadata _yet. _So for the time being, using the off-chain metadata to visualize your token, while having all the on-chain metadata is ideal so your tokens can interact with each other.
The name, description, and attributes are easy to store on-chain, but the image is the hard part. Also, where do we store this API for the tokenURI? A lot of people choose to run servers to host the information, which is great, but it is a centralized place for visualizing the token. It would be better if we could store our images on-chain so that they can’t go down or get hacked. You’ll notice in the example above, their image is using a URL that points to IPFS, and this is a popular way to store images.
IPFS stands for InterPlanetary File System and is a peer-to-peer hypermedia protocol designed to make the web faster, safer, and more open. It allows anyone to upload a file, and that file is hashed so that if it changes, so does its hash. This is ideal for storing images since it means that every time the image is updated, the on-chain hash/tokenURI also has to change, meaning that we can have a record of the history of the metadata. It’s also really easy to add an image onto IPFS and doesn’t require running a server!
Now that we know what we are looking to do, let’s build and deploy! Once you deploy your NFT token and marketplace, a token will look something like this:
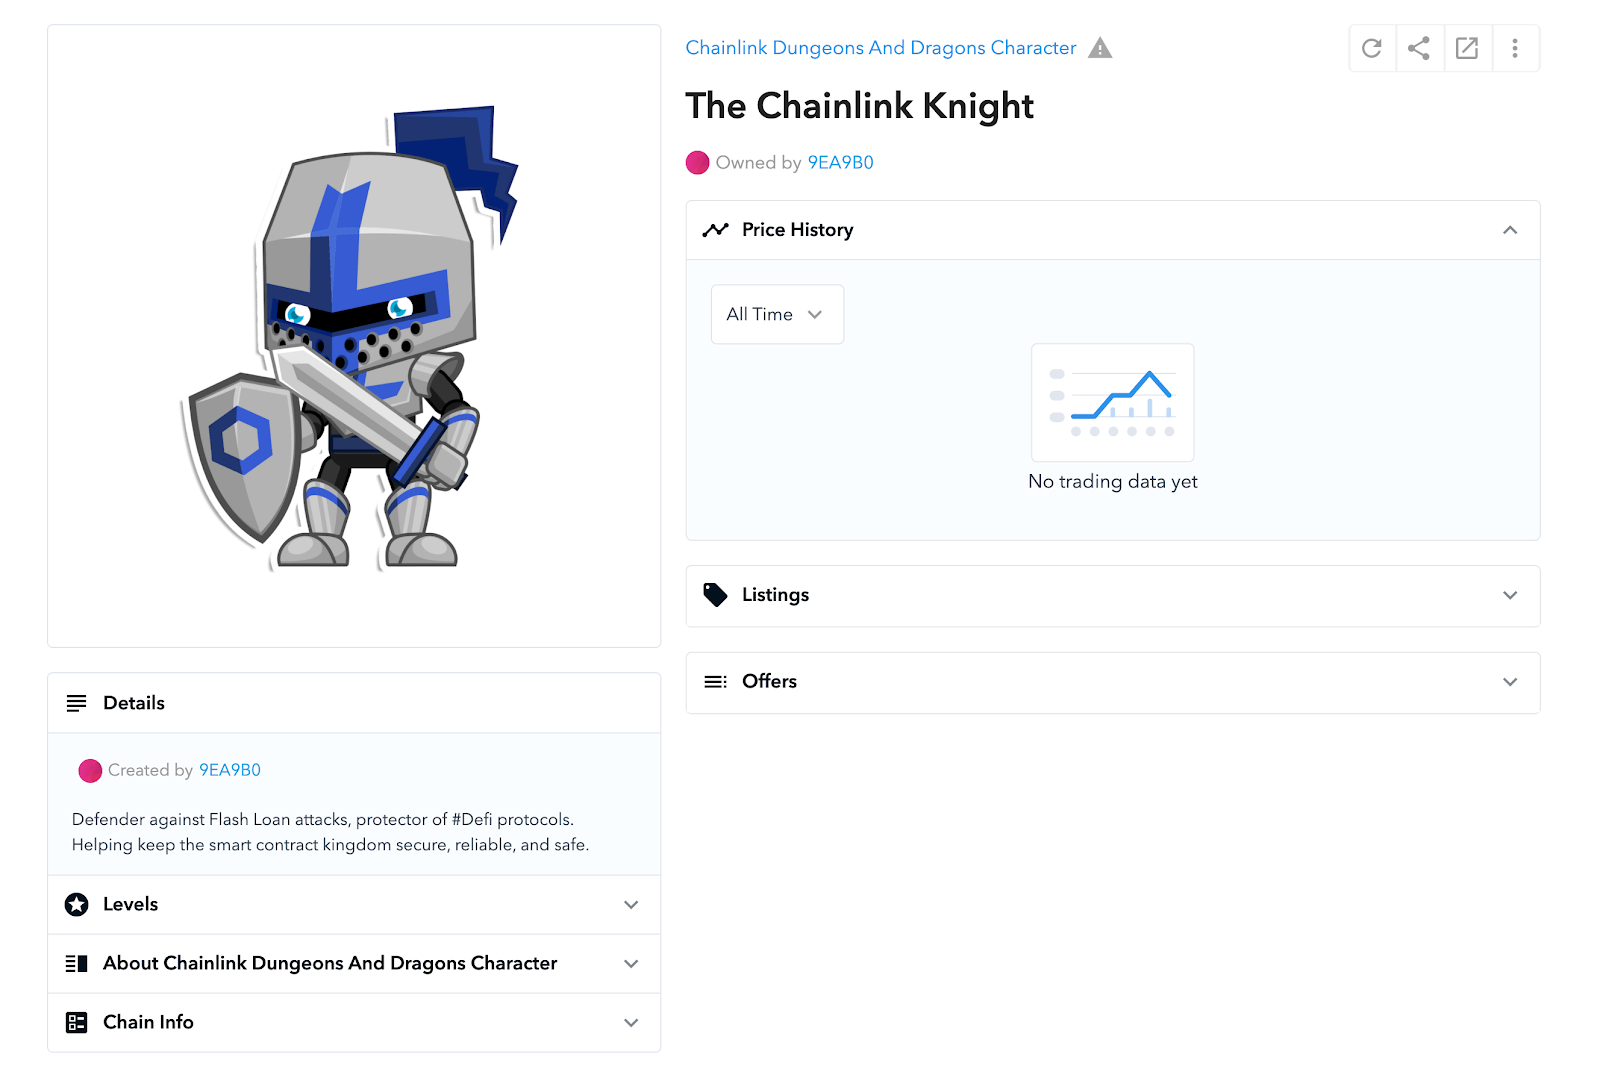
The levels section is where you’ll see your token’s randomized statistics!
How to Deploy Your Dynamic NFT Marketplace
Once again, we will be using the updated version of the Dungeons & Dragons repository which also has instructions in the readme.
Here is what we will be doing:
- Build a verifiably random D&D character using the Chainlink VRF
- Add a tokenURI using IPFS
- Adding your randomized NFTs to the OpenSea Marketplace
Keep in mind, you can change the repo so that it works for dynamic NFTs. You could easily swap out the VRF for Chainlink Price Feeds or Chainlink API.
This repo at the moment only works with Rinkeby, so please be sure to jump to Rinkeby! We will go over this from scratch, so no worries if you didn’t read the last article.
You’ll need to have Rinkeby Testnet ETH and Rinkeby Testnet LINK in your wallet to continue.
Setup Environment Variables
You’ll need a MNEMONIC and a rinkeby RINKEBY_RPC_URL environment variable. Your MNEMONIC is your seed phrase of your wallet. You can find a RINKEBY_RPC_URL from node provider services like Infura
Then, either set them in a bash_profile file or export them into your terminal like:
export MNEMONIC='cat dog frog....'

export RINKEBY_RPC_URL='www.infura.io/asdfadsfafdadf'
Then you can get started with:
Clone the Repo and Migrate
git clone https://github.com/PatrickAlphaC/dungeons-and-dragons-nft

cd dungeons-and-dragons-nft

npm install

truffle migrate --reset --network rinkeby
This will deploy your D&D NFT!
Generate a character
You can now try it out:
truffle exec scripts/fund-contract.js --network rinkeby

truffle exec scripts/generate-character.js --network rinkeby

truffle exec scripts/get-character.js --network rinkeby
This will create a new character with random stats!
Depending how often you deploy, you can pick which character by changing the dnd.getCharacterOverView(1) command in get-character.js to swap the 0 out with whatever tokenId of the character you like.
This will give you the overview of your NFT. You’ll see BN since the call returns big numbers, you can cast them to ints to see what they are. Or you could go one step farther…
See it on Etherscan
You can get an Etherscan API key for free and interact with the NFTs on-chain. Then set ETHERSCAN_API_KEY as an environment variable.
npm install truffle-plugin-verify

truffle run verify DungeonsAndDragonsCharacter --network rinkeby --license MIT
This will verify and publish your contract, and you can go to the Read Contract section of Etherscan that it gives you.
Otherwise, you can use oneclickdapp and just add the contract address and ABI. You can find the ABI in the build/contracts folder. Just remember it’s not the whole file that is the ABI, just the section that says ABI.
Deploy to OpenSea
Once we have our NFTs created, we need to give them a tokenURI. TokenURIs are the standard for showing the data of NFTs to the world. This makes it easier to store things like images since we don’t have to waste the gas of adding them on-chain.
The TokenURI represents a URL or other unique identifier, and it is an .json file with a few parameters.
{

    "name": "Name for it ",

    "description": "Anything you want",

    "image": "https://ipfs.io/ipfs/HASH_HERE?file.png",

    "attributes": [...]

}
Download IPFS and IPFS Companion
Now, we are going to be storing these images and meta data in IPFS. You’ll need:
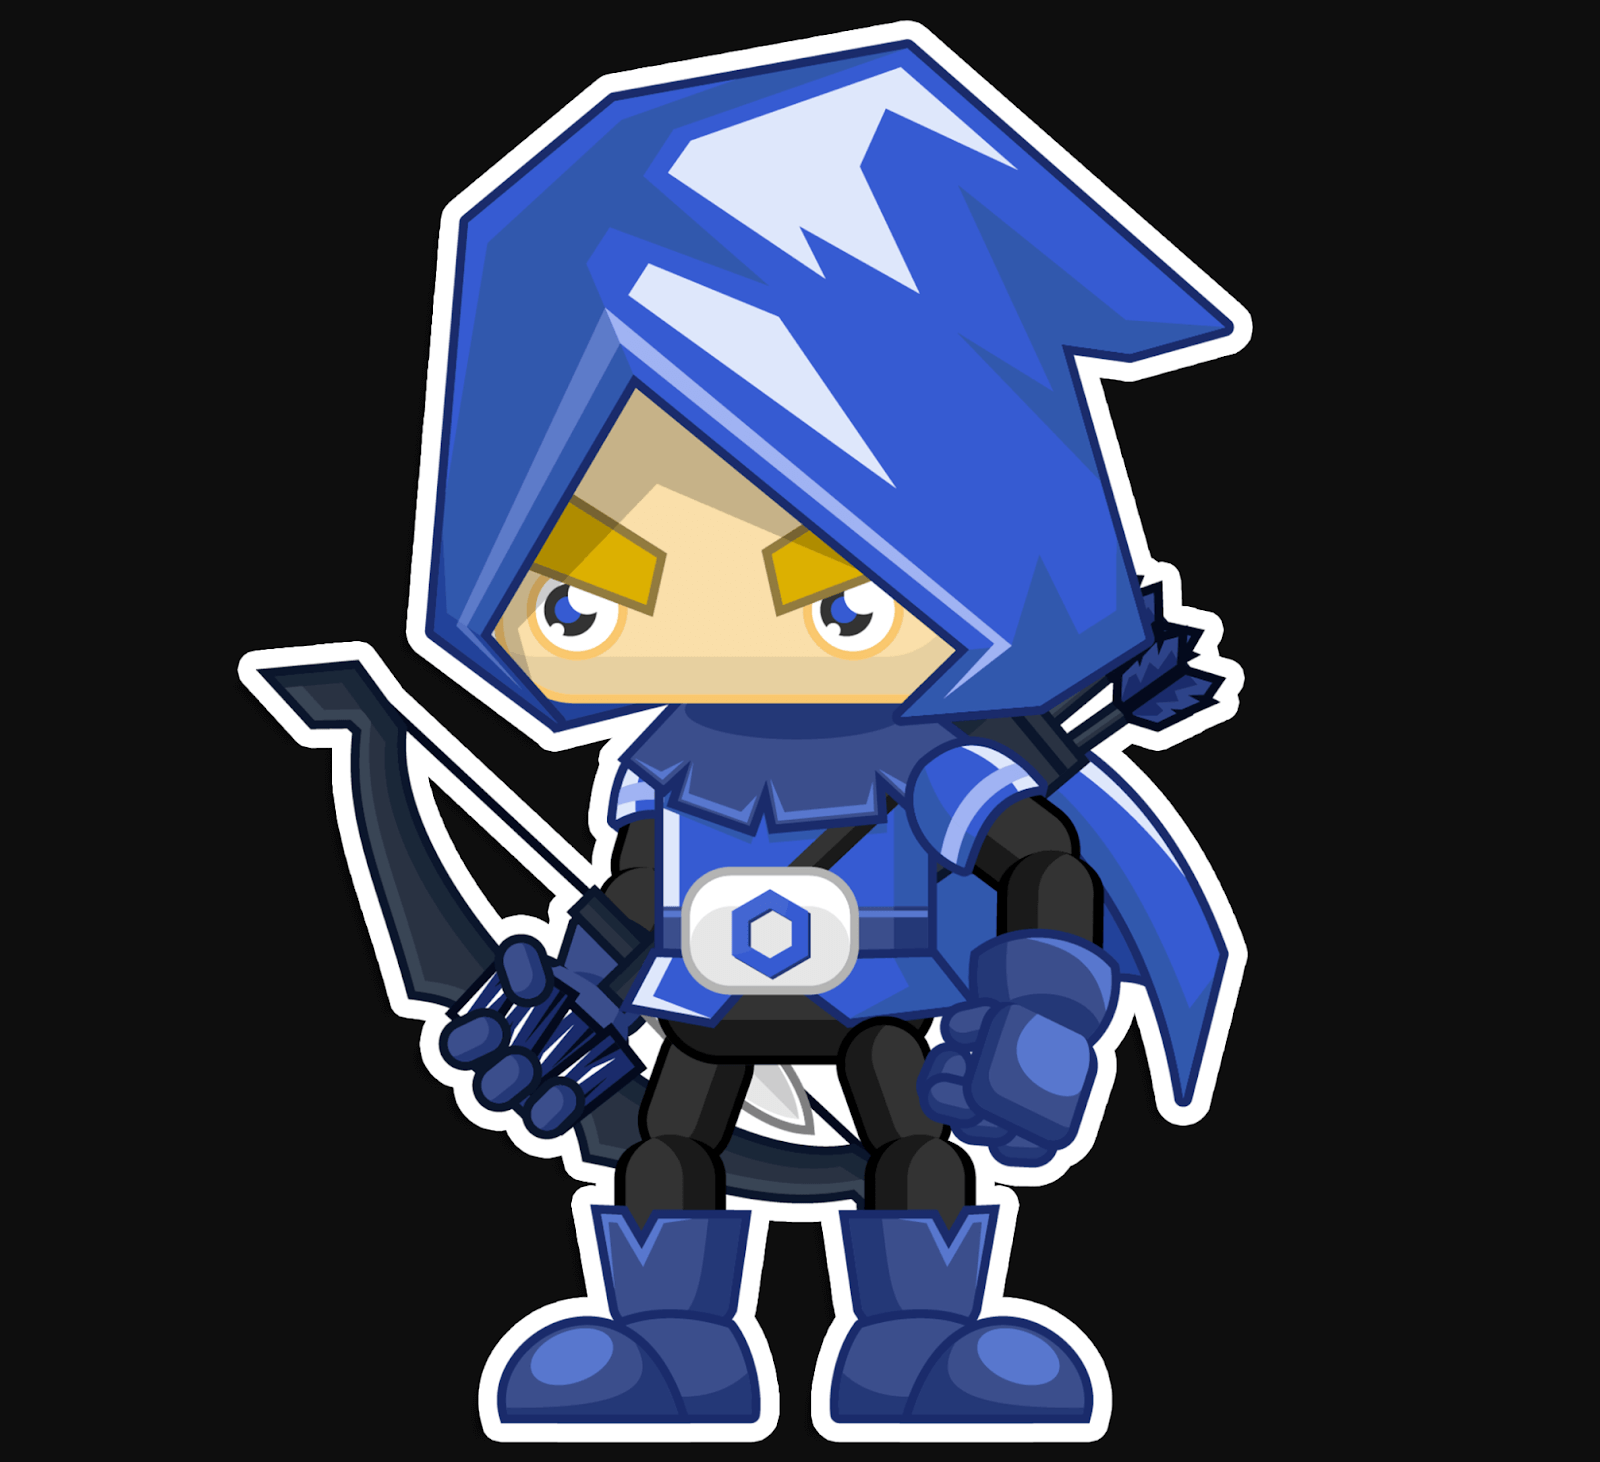
The IPFS companion lets us view IPFS data natively in our browsers like Brave or Chrome. And Pinata allows us to keep our IPFS files up even when our node is down (don’t worry about that for now). You’ll know IPFS companion is working if you click this link in your browser: https://ipfs.io/ipfs/QmTgqnhFBMkfT9s8PHKcdXBn1f5bG3Q5hmBaR4U6hoTvb1?filename=Chainlink_Elf.png
And the following shows up:
Add your image to IPFS
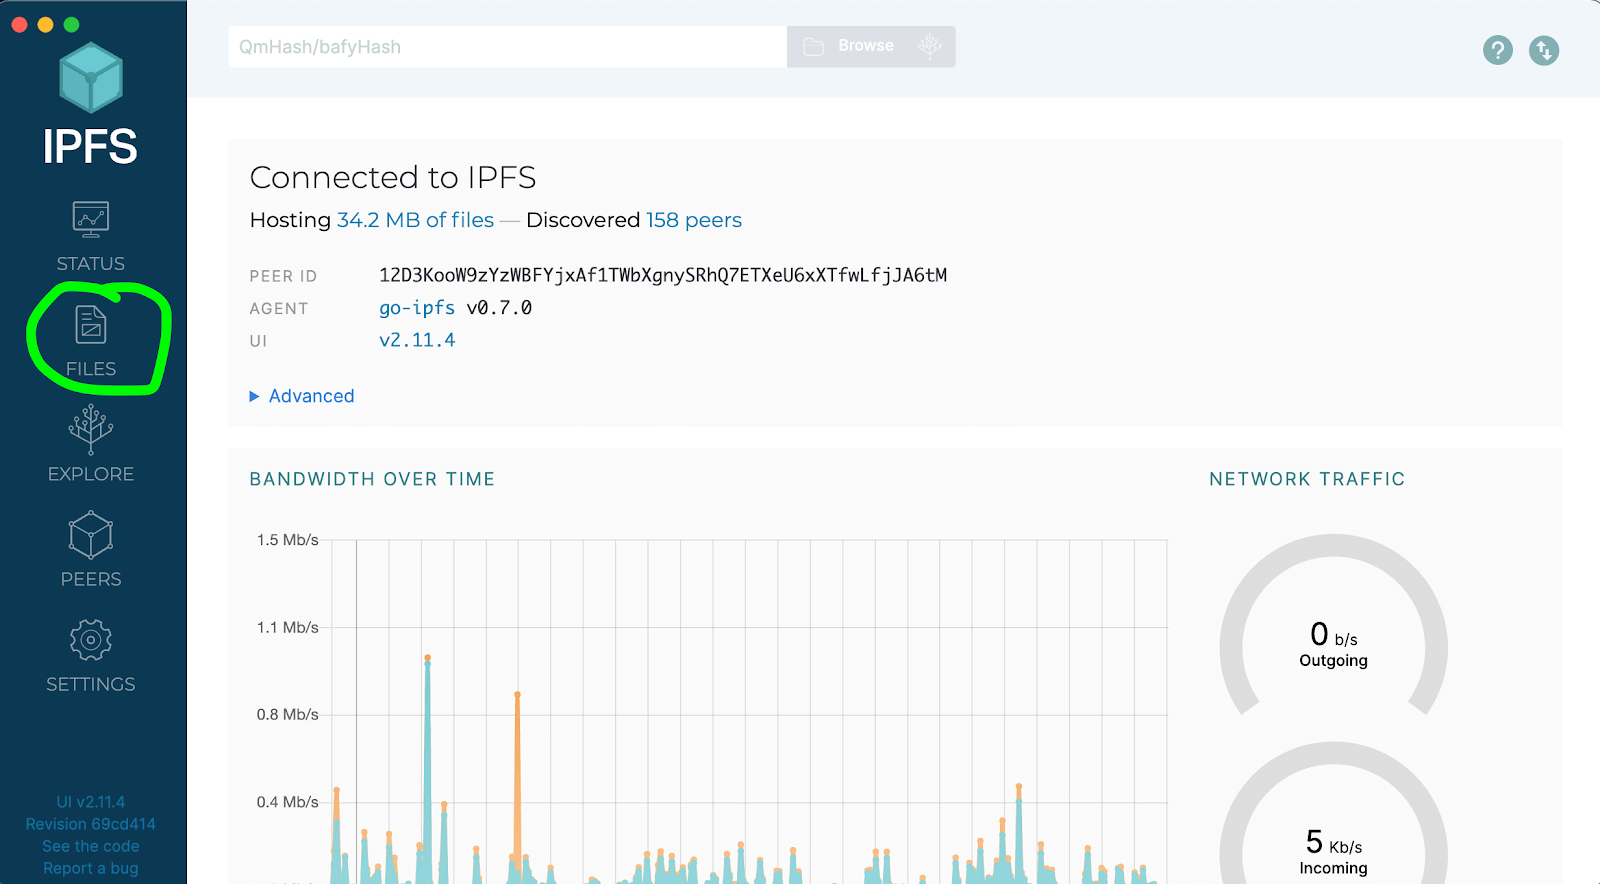
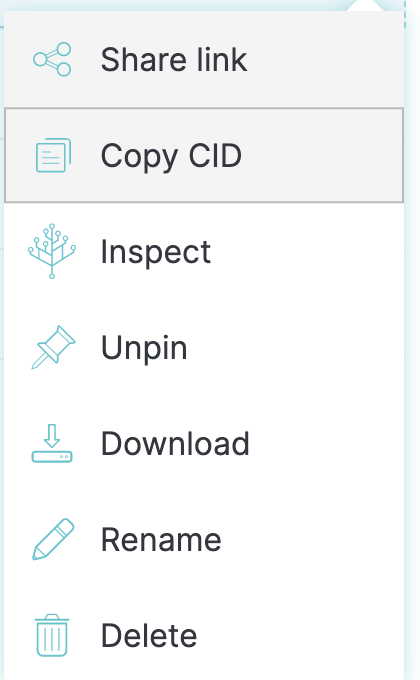
Once our IPFS node is up, we can start adding files to it. We first want to upload the image of our NFT. Head over to the “files” section of your IPFS install.
What does this D&D character look like? Add it to your IPFS node and then “Pin” it. For now, feel free to pin a blank image, or something silly.
Add your metadata file to IPFS
Then, you’ll want to add your metadata JSON object to IPFS. You’ll need to get your name and attributes from your deployed token. We did some of the work for you in the create-metadata.js script. Just run
truffle exec scripts/create-metadata.js --network rinkeby
And your metadata will show up in the metadata folder. It just needs the image URL now! The metadata is the random numbers and stats we created from using the Chainlink VRF. Now we get the CID of the pinned image we created and add it to our metadata JSON file, and then add that file to IPFS as well, and pin it there! It’ll look something like this:
Pinata
If our IPFS node goes down, or we turn off our computer, we won’t be able to pull our metadata, so we need a way to keep them pinned and have other nodes host the data. This is where Pinata comes in. Don’t worry, it’s free! This will just help keep the data up even when our IPFS node is down. We copy our CID of our Image and JSON metadata file, and add it to our Pinata account. It takes a few seconds to sign up.
This metadata json file is going to be our tokenURI, so we will modify our set-token-uri.js with the tokenId of the NFT we are giving a picture to, and adding the ipfs tokenURI.
Then we run it with:
truffle exec scripts/set-token-uri.js --network rinkeby
Now, we can get the address of our NFT and head on over to the OpenSea testnet marketplace to see if we did it correctly. If done correctly, it’ll look something like this. We will have to make an account with OpenSea first.
Here is the link for adding your testnet NFT contract to be viewed on opensea. Then, you can get to work selling your NFT!
Next Steps
And we should be all set! We covered a LOT of information here, so be sure to reach out to our Discord if you have any questions. The community of smart contract and Chainlink engineers is huge, and a lot of bright people are getting together to push NFTs and smart contracts into the limelight, so the Discord is a great place to meet other people as well. You’ll also want to check out the Chainlink Builders Program, where you can win some cool prizes for building with Chainlink!

As always, be sure to visit the developer documentation and you can also subscribe to the Chainlink Newsletter to stay up to date with everything in the Chainlink stack.
If you learned something new here, want to show off what you’ve built, or developed a frontend for some of the demo repos, make sure you share it on Twitter, Discord, or Reddit, and hashtag your repos with #chainlink.
Website | Twitter | Discord | Reddit | YouTube | Telegram | Events | GitHub | Price Feeds | DeFi


