How To Create a BEP-20 Token on BNB Chain
BEP-20 tokens are fundamental to transacting on BNB Chain. In this tutorial, you’ll learn how to create a BEP-20 token and deploy to BNB Chain.
What Are BEP-20 Tokens?
BEP-20 is a standard for tokens on BNB Chain that builds upon the framework set by the ERC-20 standard. The BEP-20 and ERC-20 standards both create fungible tokens, which are interchangeable. Fungible items are things you care about the quantity of—they’re not unique. Fiat currency is a good example: You don’t care which dollars you have but how many. Non-fungible items are not interchangeable. You care about which one you own.
What is BNB Chain?
BNB Chain was created via a hard fork, or permanent divergence, of the Go Ethereum protocol (Geth). While it is quite similar to Ethereum, there are a few significant differences.
The most notable difference is that BNB Chain uses a different consensus mechanism.BNB Chain uses 21 validators, which take turns producing blocks. These validators are backed by delegators who stake BNB, the native coin of BNB Chain. This consensus mechanism is known as Proof of Staked Authority (PoSA). Validators are chosen based on the amount staked, and the top 21 candidates are elected to validate.
Advantages of BNB Chain
Given that the BNB Chain chain was created via a fork of Geth, it is EVM-compatible. This means you can deploy the same contracts on BNB Chain as on Ethereum. Being a PoSA network, BNB Chain has different trade-offs than Ethereum. This leads to some advantages for specific use cases. Notably, BNB Chain is relatively fast and low cost, which attracts developers to the network.
Bridging Assets to BNB Chain
How do you get your assets from the Ethereum main chain to BNB Chain?
To transfer assets from Ethereum to BNB Chain you will need to interact with the Binance Bridge. This is a contract that will take custody of your assets on the Ethereum side and, after a bit of a delay, create a version of that asset on the Binance side.
You might think about this as a little like using tokens in an arcade. You give the arcade employee (bridge contract) your money (ETH) and in turn, they create tokens (ETH BEP-20, A BEP-20 version of ETH) to use within the arcade (BNB Chain). From there you can use the tokens (ETH BEP-20) while you are in the arcade. If you would like to leave you can give your tokens (ETH BEP-20) back to the employee (bridge contract) and they will destroy or burn the tokens (ETH BEP-20). Then they’ll give you back the money (ETH) for the tokens (ETH BEP-20).
What You’ll Need
To start building on BNB Chain you need the same tools you’d use to build on any EVM-compatible chain. That’s the advantage of using EVM-compatible chains: Often, they support the same tools. For this tutorial, we will be using:
Remix—a web-based solidity IDE
Brave Wallet—a crypto wallet similar to Metamask
BNB Chain Testnet—BNB Chain’s test network
Binance Faucet—to obtain test net BNB
OpenZeppelin—a secure standard for blockchain contracts
Connect to BNB Chain Testnet
Before you can start building an application on BNB Chain testnet, you’ll need to set up your wallet. A great tool for this is Chainlist, which allows you to simply connect your wallet and add chains from there (you will need to setup your wallet first.) The details for adding the chain yourself can be found in the Binance Docs.
Network Name: Binance Testnet
New RPC URL: https://bsc-dataseed.binance.org/
ChainID: 97
Symbol: BNB
Block Explorer URL: https://testnet.bscscan.com
Obtain Testnet BNB
The native token for the BNB Chain testnet is BNB. To deploy and interact with contracts, we will need to obtain some. Head to the Binance Faucet to get some testnet BNB. You will need to supply your wallet address and click “Give me BNB.”

Building the Contract
Head over to the Remix IDE to get started.
The sample contracts can be ignored for now.
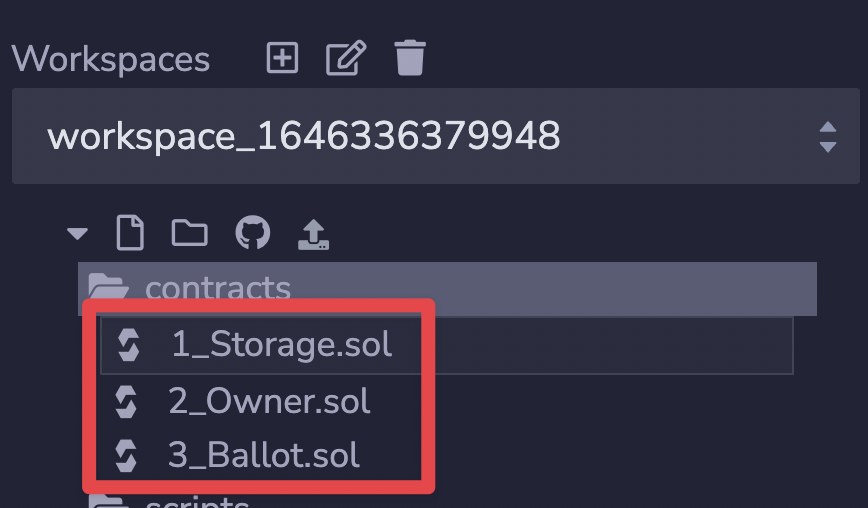
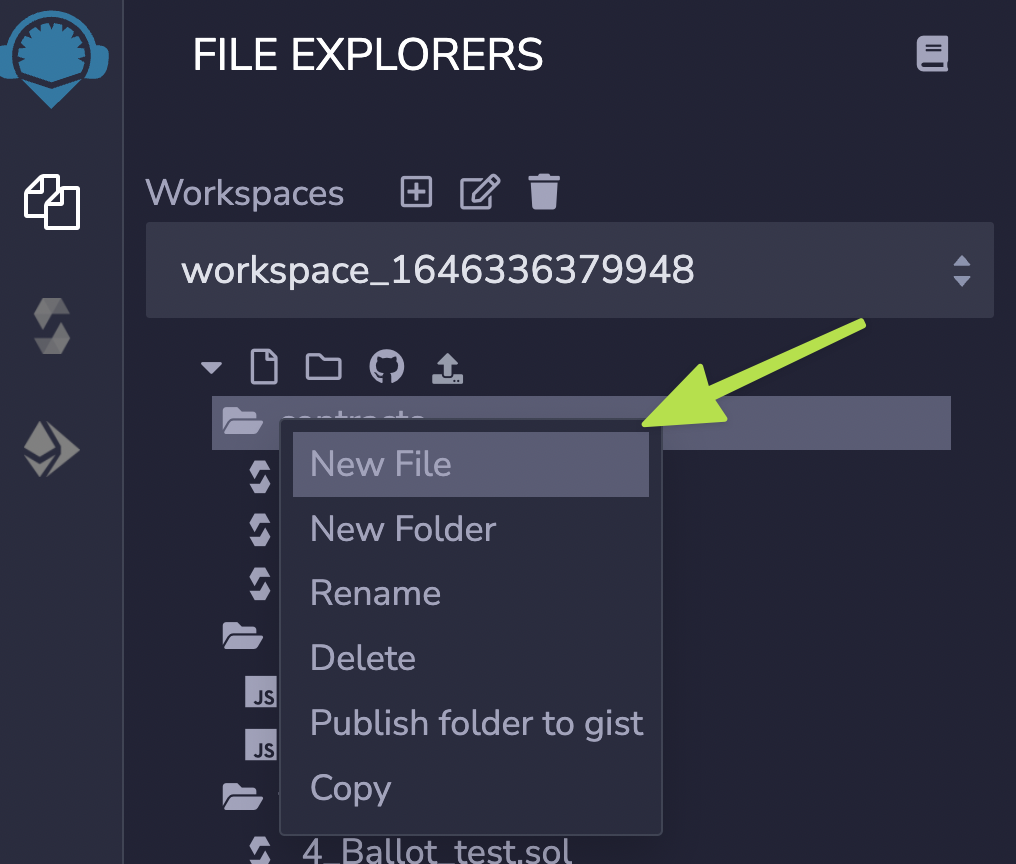
Create a new contract in the contracts directory.
Name it BSCCoin.sol
// SPDX-License-Identifier: MIT
pragma solidity ^0.8.0;
import "@openzeppelin/contracts/token/ERC-20/ERC-20.sol";
contract BSCCoin is ERC-20 {
    constructor(uint256 initialSupply) ERC-20("BSCCoin", "BSCC") {
        _mint(msg.sender, initialSupply);
    }
}
Let’s take a look at this code
First, we define the version of Solidity we will be using.
pragma solidity ^0.8.2;
This is the basic ERC-20 token from OpenZeppelin. We import it into our contract. While creating a BEP-20 token, remember that they are very similar to ERC-20 tokens. Therefore, we can utilize the OpenZeppelin ERC-20 contract to build our token.
import "@openzeppelin/contracts/token/ERC-20/ERC-20.sol";
See their getting started page for more details.
Using OpenZeppelin’s contracts means our contract can be much simpler. We inherit the ERC-20 contract and use it to create our BEP-20 token.
// Define our contract and inherit the ERC-20 contract
contract BSCCoin is ERC-20 {
 // When the contract is run create a BEP-20 Token
 // The token will be names "BSCCoin"
 // The token will have the symbol "BSCC"
    constructor(uint256 initialSupply) ERC-20("BSCCoin", "BSCC") {
 // Create an initial value for the runner of the contract
        _mint(msg.sender, initialSupply * 10 ** decimals());
    }
}
A Note On Decimals
Solidity doesn’t use decimals. This means that you need to use fixed-point arithmetic any time you want to use less than whole numbers. You need to store a fixed number of decimals in the value. In this case, decimals() is set to 18, which means we are multiplying the number of tokens we mint by 10^18.
Deploying
With this contract, you have a fully functional BEP-20 token! Now it’s time to deploy it to the BNB Chain testnet.
First, change the Environment to “Injected Web3.” This will enable Remix to interact with the blockchain via your wallet.

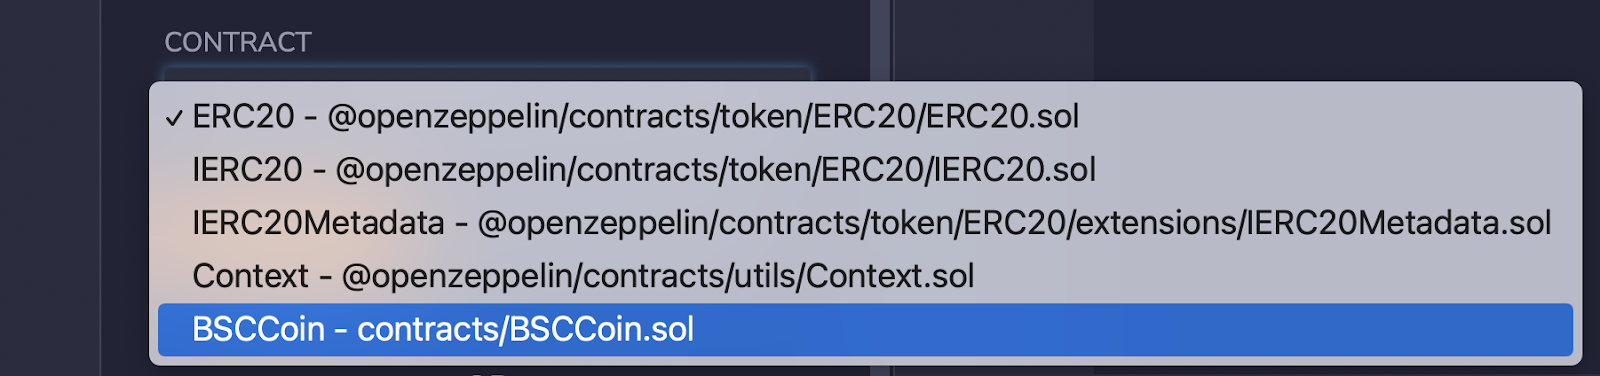
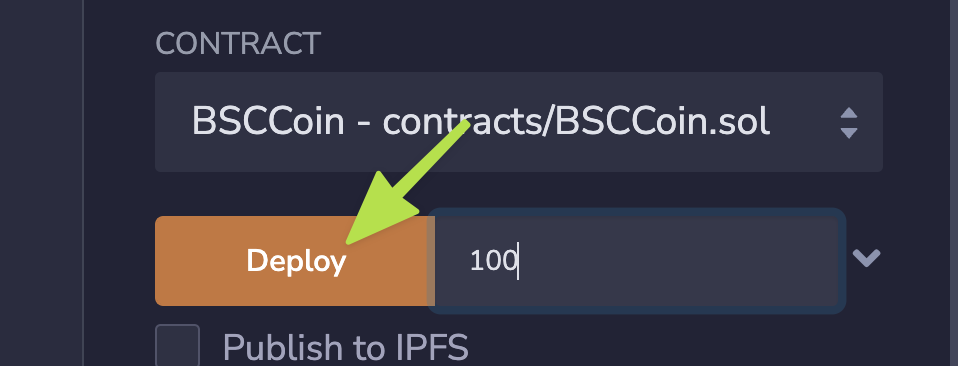
Next, ensure you are deploying the correct contract. That’s “BSCCoin” in this example.
Specify the number of tokens to create, then click on the “Deploy” button, and you should see a confirmation button. We are deploying to a live blockchain. Therefore, a gas fee will be involved.

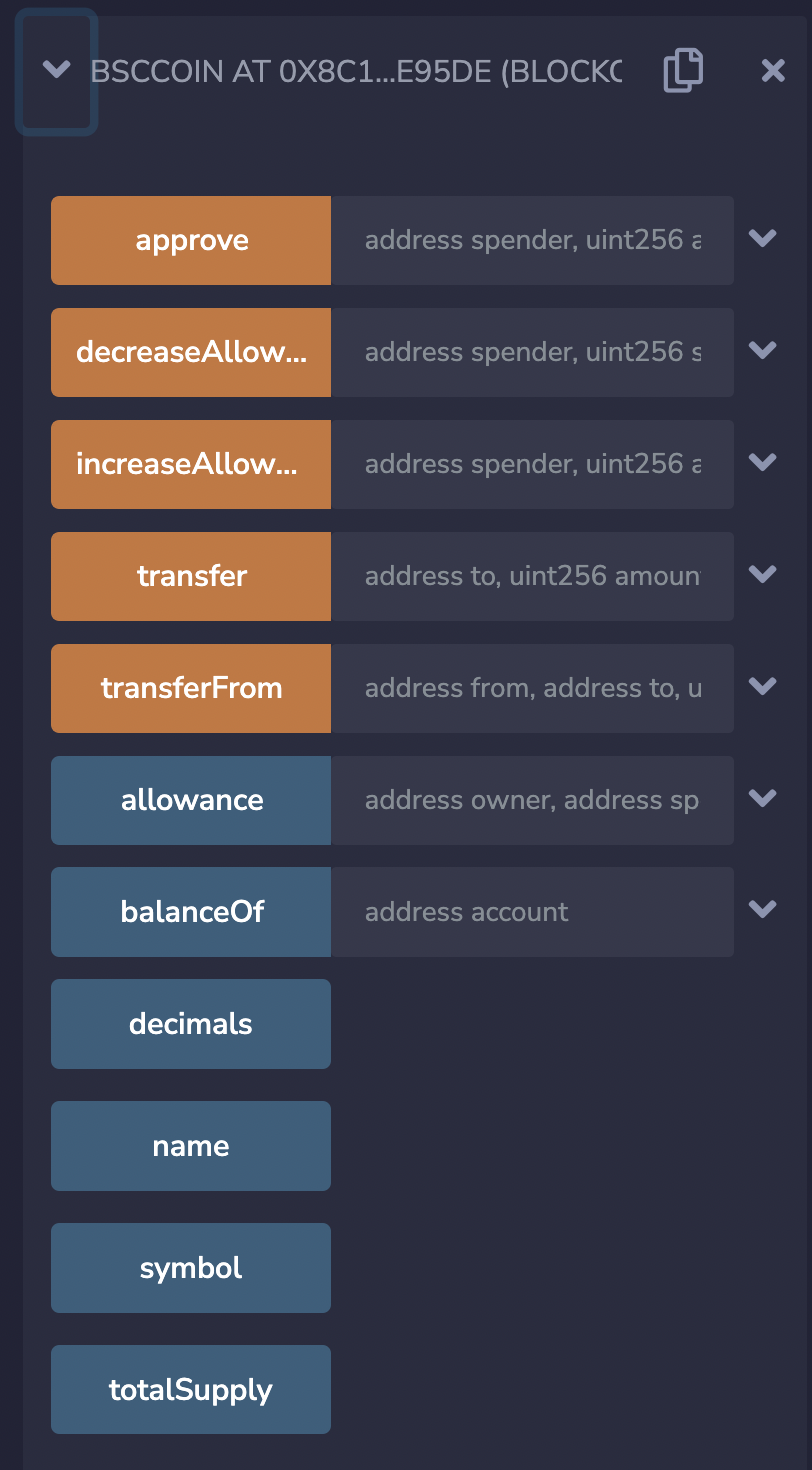
It may take a moment for the contract to be fully deployed. Once it is, you will see it under “deployed contracts.” You can all see all of the functions available in the contract. These functions were imported from the OpenZeppelin contract.
Verifying
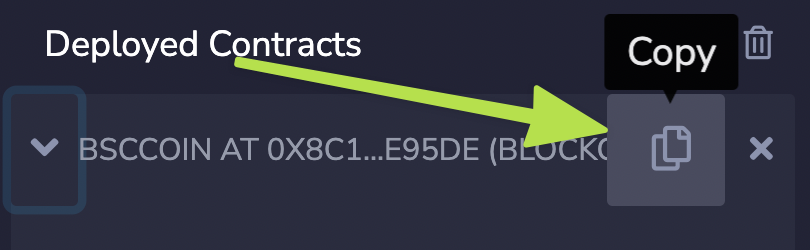
Once the contract has been deployed, we can double-check that it’s showing up on the BNB Chain testnet.
Copy the contract address and head to BNB ChainScan.
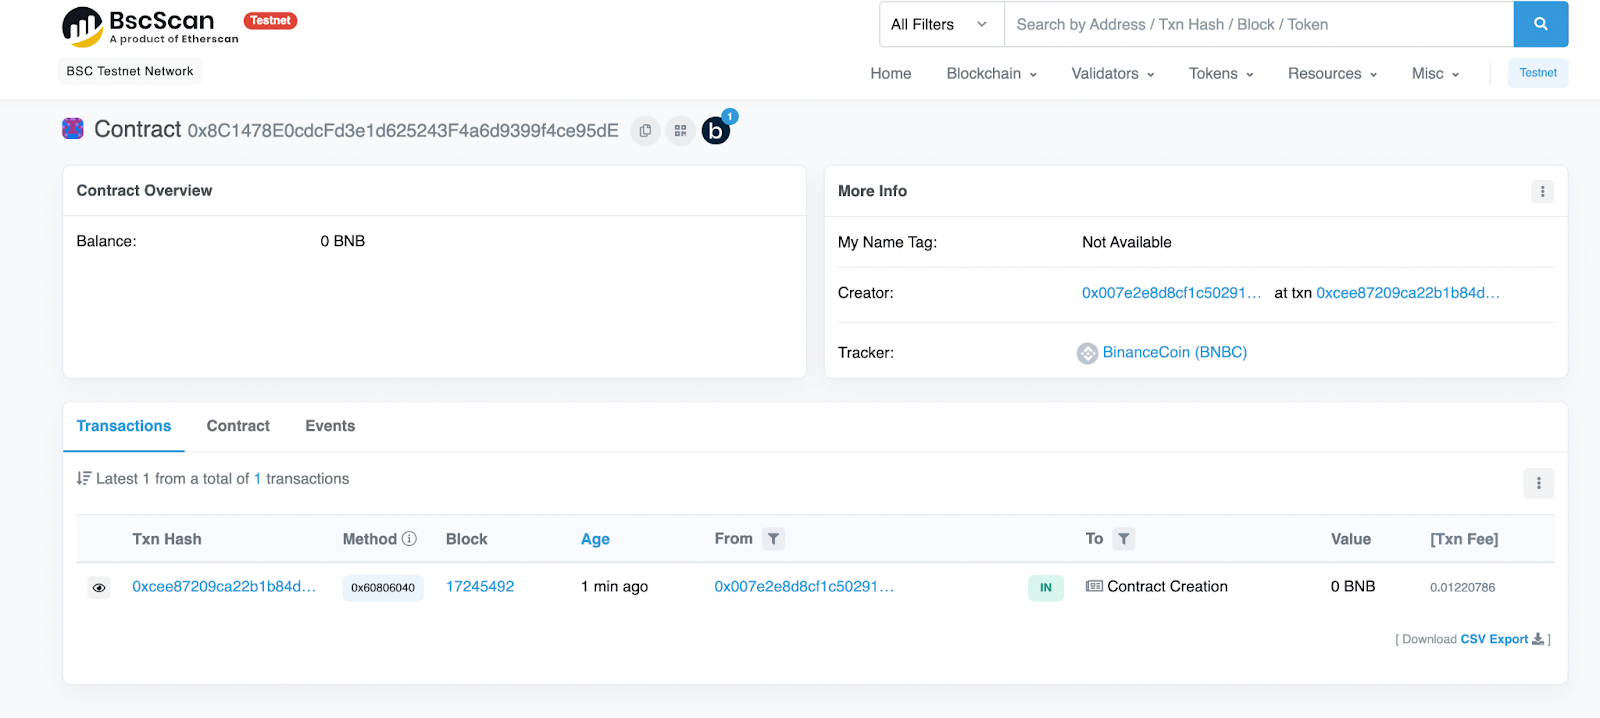
Enter the contract address and search for it.
You should see the contract and token.
Congratulations, you’ve just deployed a BEP-20 token to the BNB Chain testnet!
Where To Go From Here
From here, you could take your token to BNB Chain mainnet, or you could add more functionality to it. The OpenZeppelin contracts support additional minting, burning, voting, and more. Check out the OpenZeppelin docs for full details.
Now that you know how to create a BEP-20 token, many new opportunities are open to you. You could use it to interact with DeFi applications, create a governance protocol, or launch a Chainlink Price Feed to track its price.
You can also check out the complete video walkthrough to learn how to create a BEP-20 token on BNB Chain or access testnet LINK on BNB Chain to build advanced applications:
Learn more about Chainlink by visiting chain.link or reading the documentation at docs.chain.link. To discuss an integration, reach out to an expert.


