How To Verify a Smart Contract on Etherscan
The beauty of the new decentralized vision for the Internet called Web3 is the ability for anyone to interact with smart contracts deployed on a general-purpose blockchain. As you may already know, smart contracts are computer programs that run on blockchains whose source code is publicly available for anyone to verify, and, as said, anyone can interact with them without the need for a web-based interface. This can be done by running a blockchain client and creating transactions using a command-line interface (CLI).
The middle ground between web or mobile applications and a CLI for interacting with smart contracts would be Etherscan—a block explorer for various blockchain networks such as Ethereum, Polygon, Arbitrum, Optimism, and many more. If you are curious about how to interact with a smart contract on Etherscan, check out this recent blog post about reading a smart contract on Etherscan.
With that said, we can only interact with “verified” smart contracts on Etherscan. In this technical tutorial, you will learn how to verify smart contracts on Etherscan.
Verification of Single Solidity Files
To start with the verification process, we need to first deploy the smart contract. Navigate to Remix IDE and create a new file called “Counter.sol”. Paste the following code:
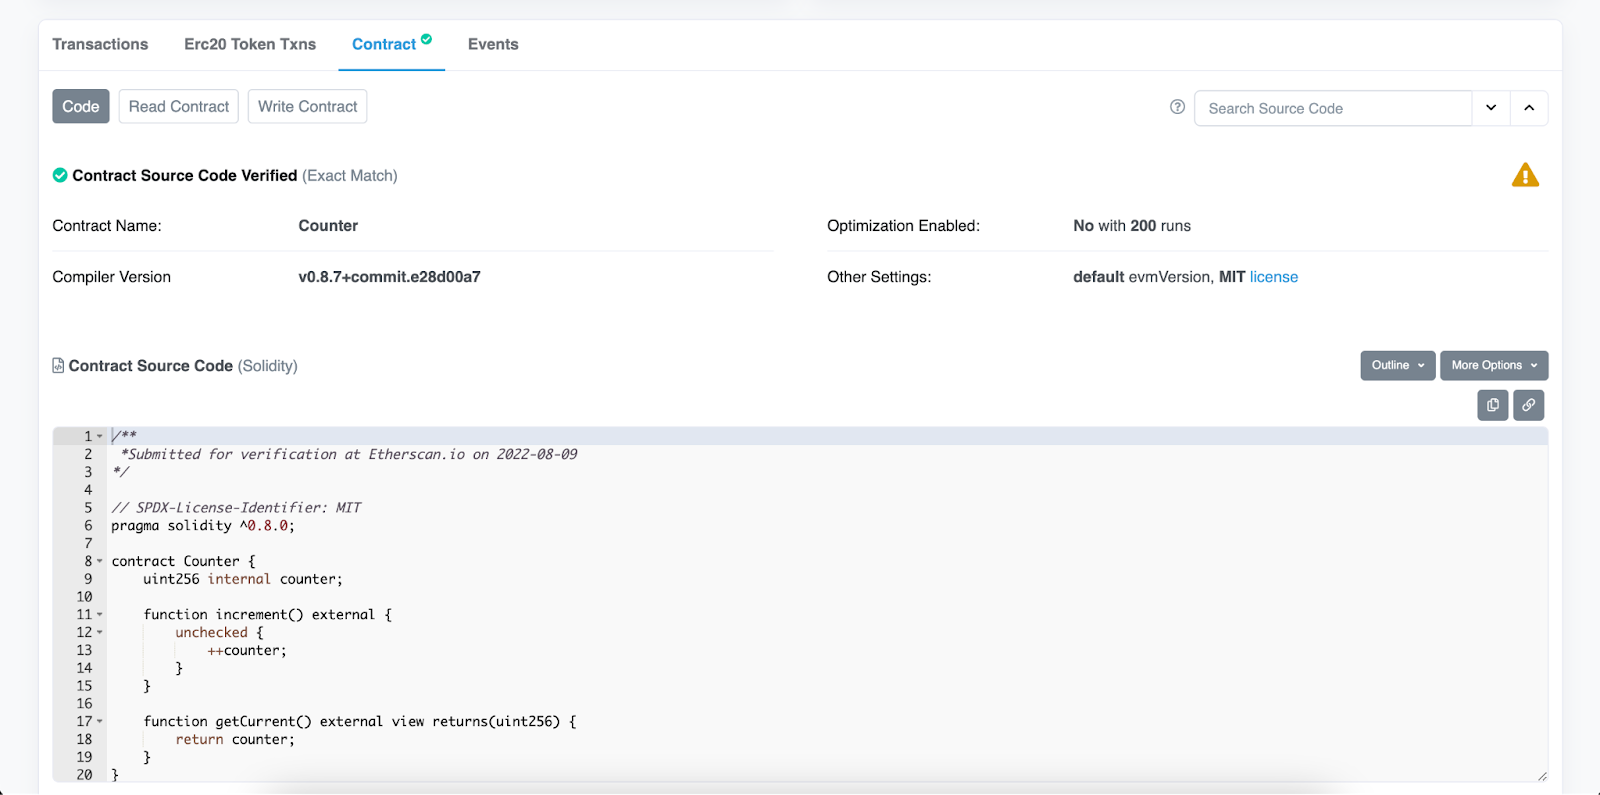
// SPDX-License-Identifier: MIT

pragma solidity ^0.8.0;

contract Counter {
    uint256 internal counter;
    function increment() external {
        unchecked {
            ++counter;
        }
    }

    function getCurrent() external view returns(uint256) {
        return counter;
    }
}
Before deployment, we must pay attention to the version of the Solidity compiler we used for compiling this contract, as well as the contract’s license which is provided at the top of the file as “SPDX-License-Identifier”.
We specified inside the contract file that it can be compiled with any Solidity compiler version between 0.8.0 and 0.9.0, which contains multiple versions such as 0.8.0, 0.8.1, 0.8.2, etc.
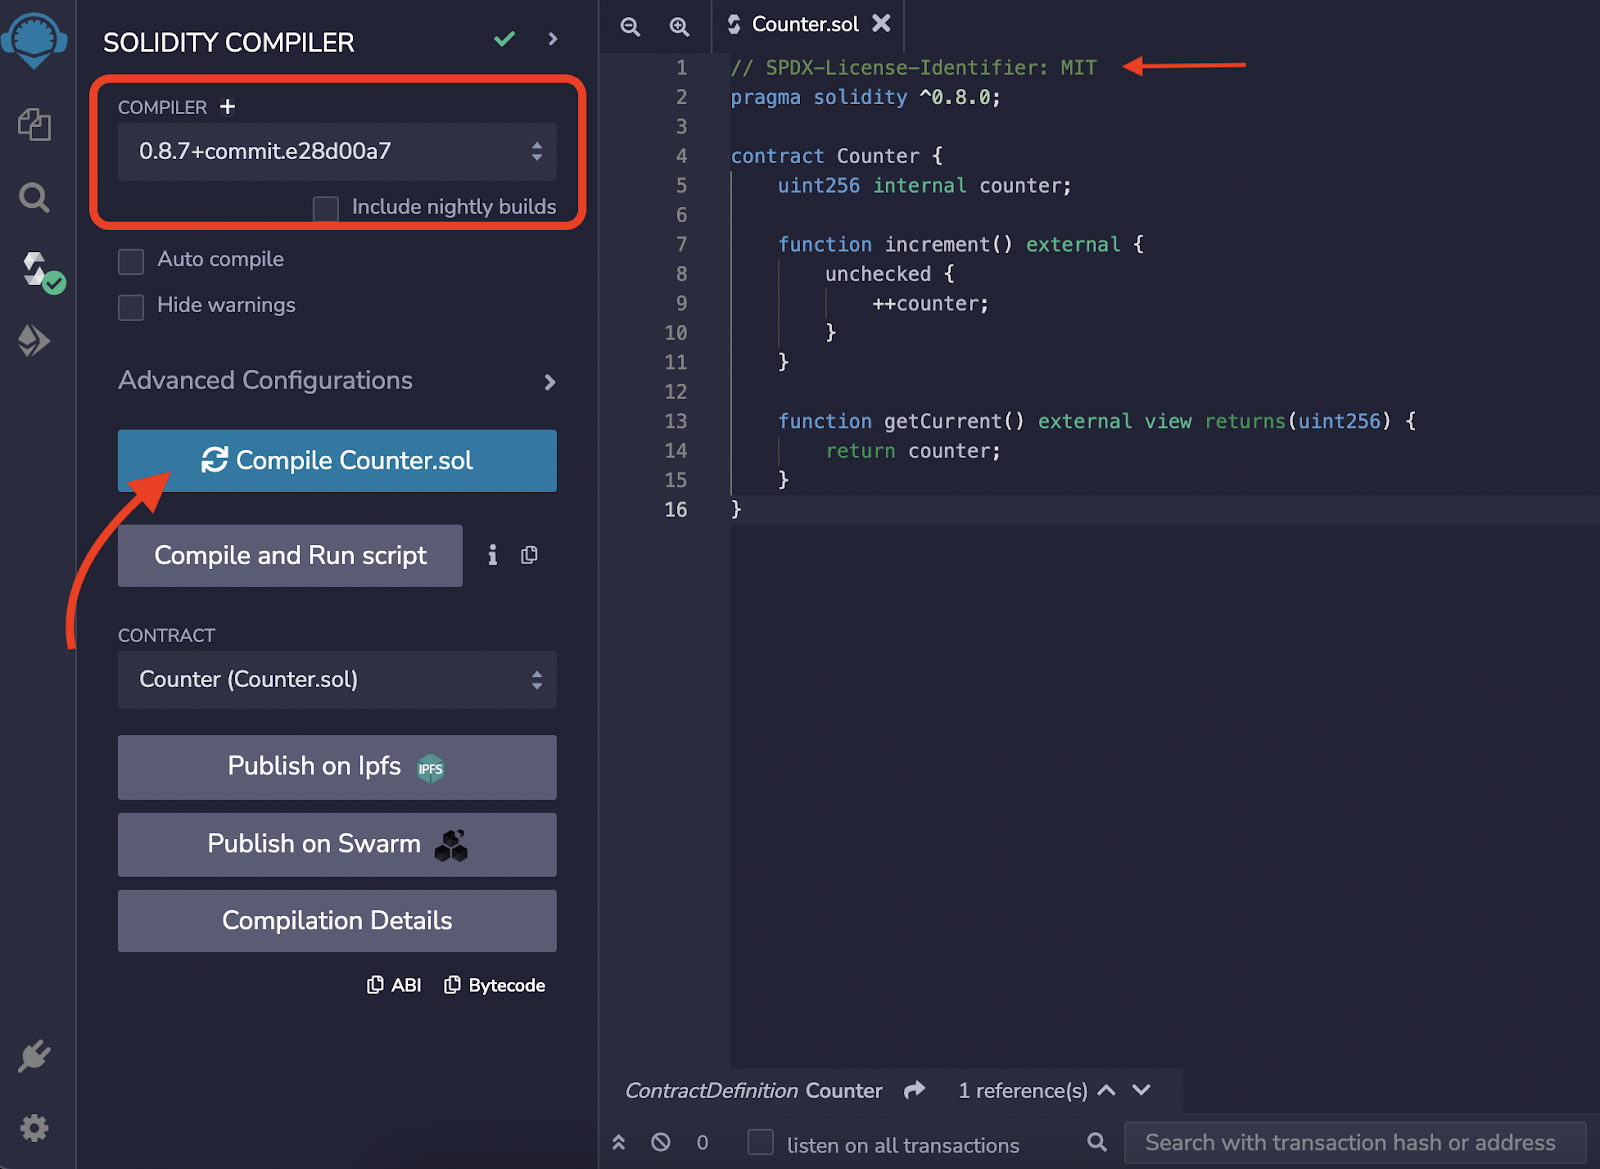
Go to the “Solidity Compiler” tab, select the Solidity compiler version (remember, it can be any 0.8 version), and click “Compile Counter.sol”. For this example, we will use the 0.8.7 compiler version.
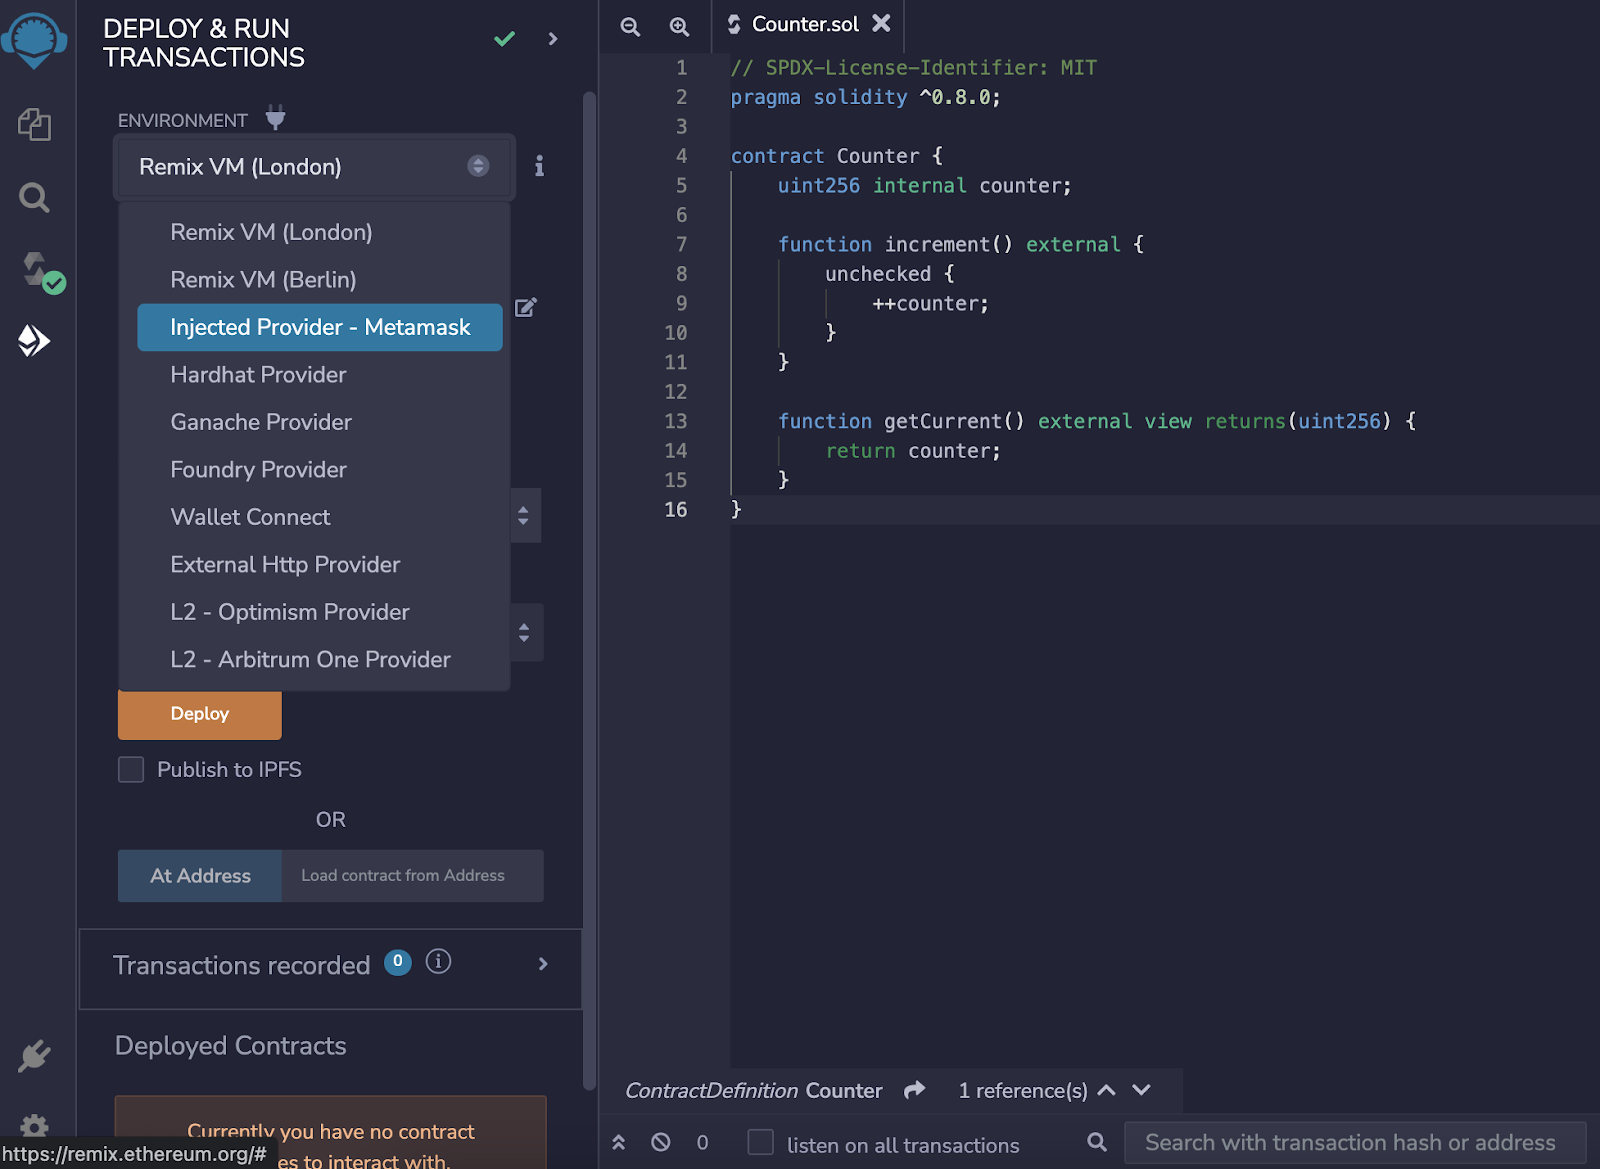
After successful compilation, navigate to the “Deploy & Run Transactions” tab just below the current one. From the “Environment” dropdown, select “Injected Provider – Metamask”, which will automatically display a MetaMask popup to connect your wallet to the Remix IDE website. After that, select the blockchain network you want to deploy your contract to inside your wallet.
We will deploy this contract to Rinkeby, therefore we need to select “Rinkeby Test Network” inside our MetaMask wallet. To deploy the contract, we will also need some amount of Test Rinkeby ether. You can grab some for free from the Chainlink Faucet simply by connecting your wallet to the faucet. Make sure that the selected network at the upper right corner dropdown is Ethereum Rinkeby.
Finally, click the orange “Deploy” button and sign the transaction inside the MetaMask wallet. Wait approximately 15 seconds until your transaction is confirmed. You can now interact with your smart contract through the Remix IDE UI, but that’s not the point since we want to allow anyone to use it.
If we track our contract on Etherscan, simply by either tracking the last transaction hash or by pasting the contract’s address into Etherscan’s search bar, we will see only the contract’s bytecode when clicking the Contract tab. This means that we need to “verify” our smart contract on Etherscan in order to use it via this block explorer.

To start the verification process, click the “Verify and Publish” blue hyperlinked text. The following page will show up.
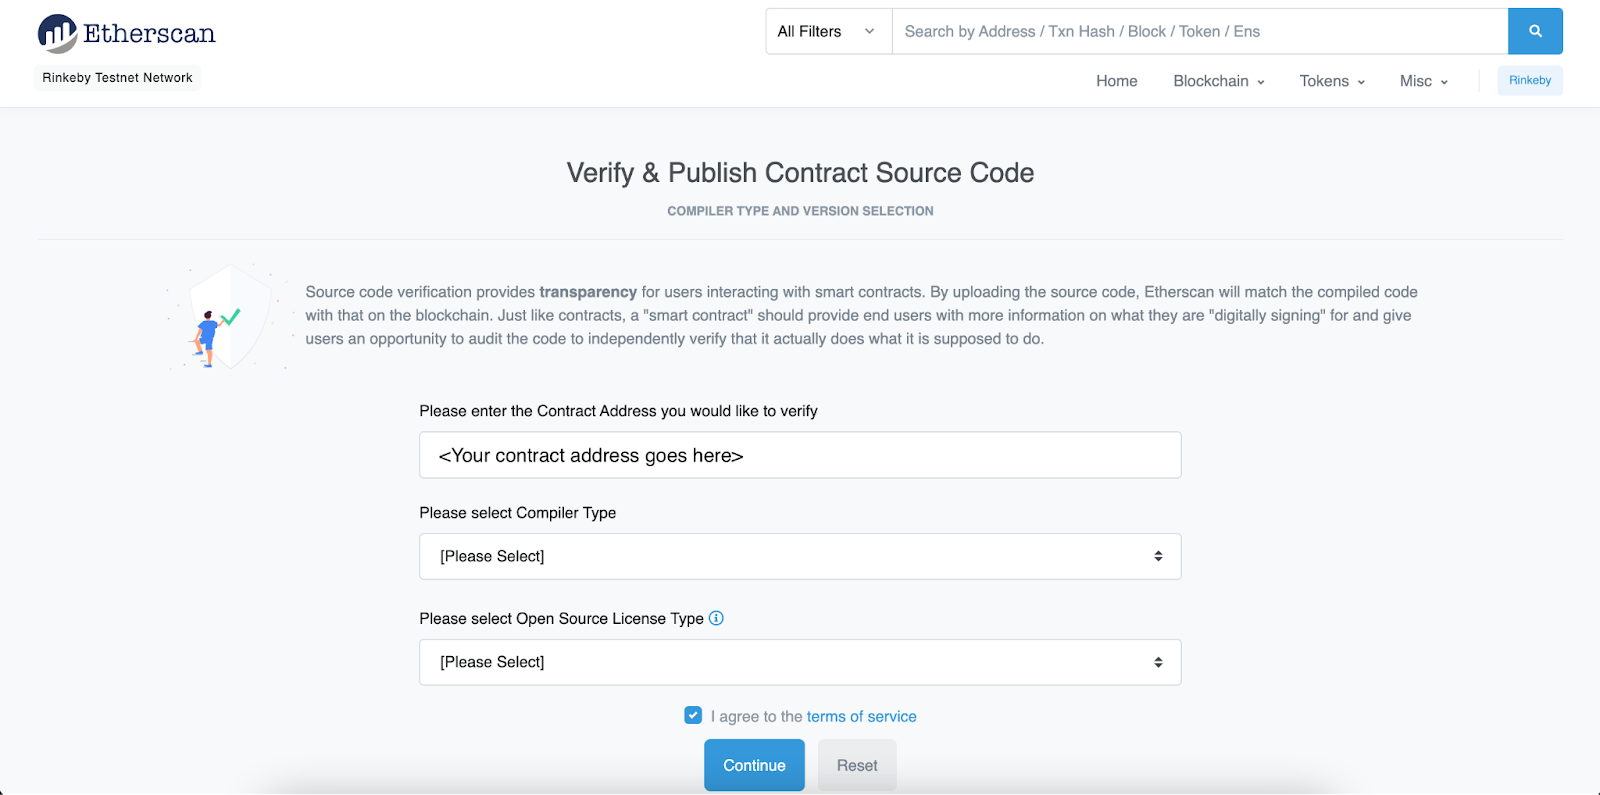
Enter your contract address into the first input field if it isn’t populated by default already. Then from the “Compiler Type” dropdown, select “Solidity (Single File)”. After that, the “Compiler Version” dropdown will show up. Here we need to select the same Solidity compiler version we used for compiling this smart contract before the deployment—in our case, that was the 0.8.7 version. Finally, from the “Open Source License Type” dropdown, select the license specified at the beginning of the Solidity file as “SPDX-License-Identifier”. In our case, that’s MIT. Click Continue to go to the next page.
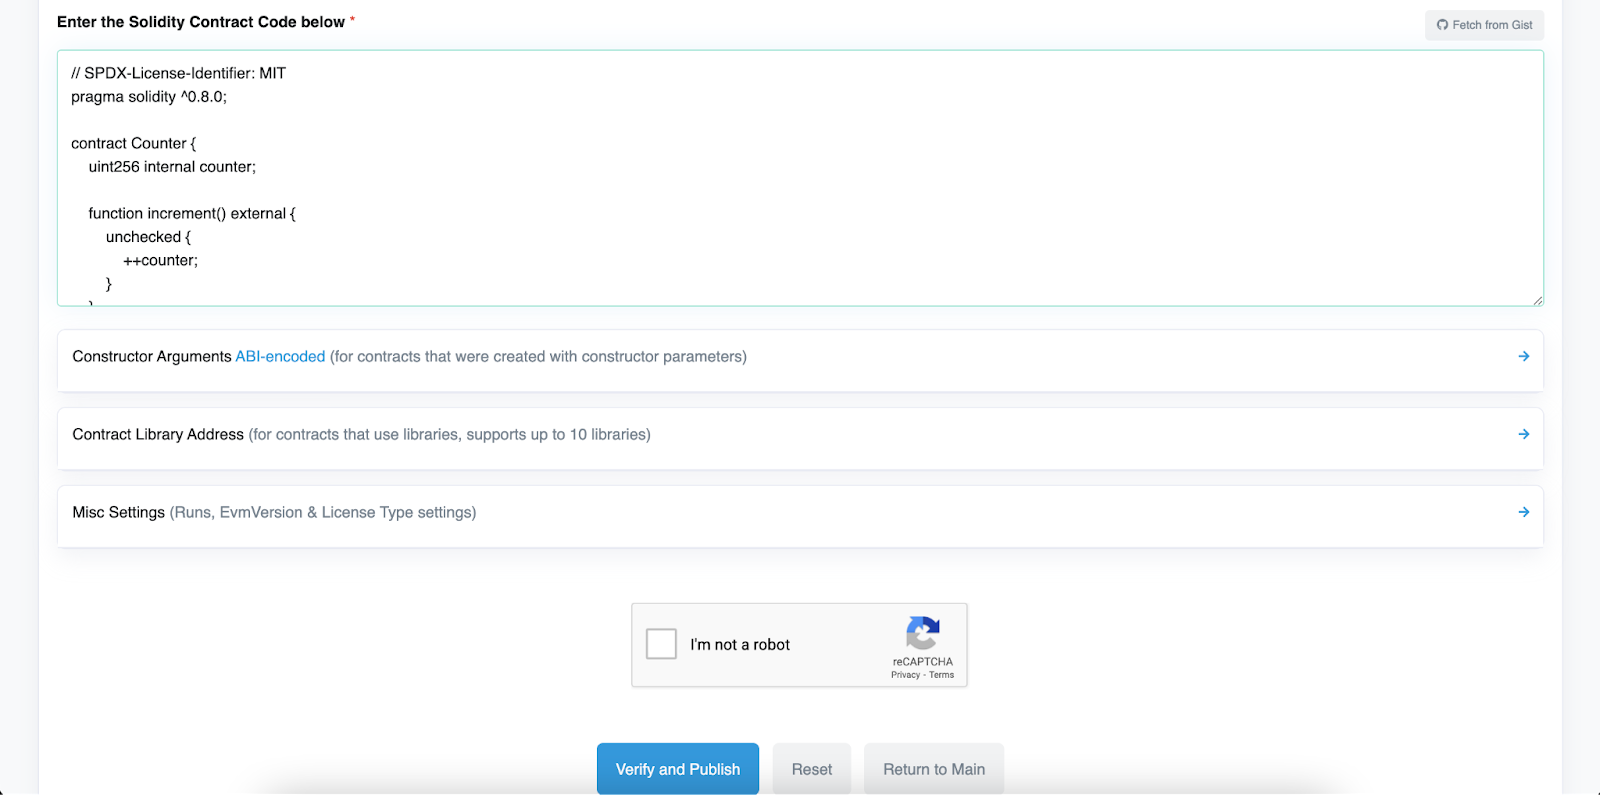
Paste the contract’s source code into the “Enter the Solidity Contract Code below” input box, solve the Captcha, and click the blue “Verify and Publish” button. You should be able to see the green checkmark on the Contract tab now. This means that the contract is verified and that we can now interact with it.
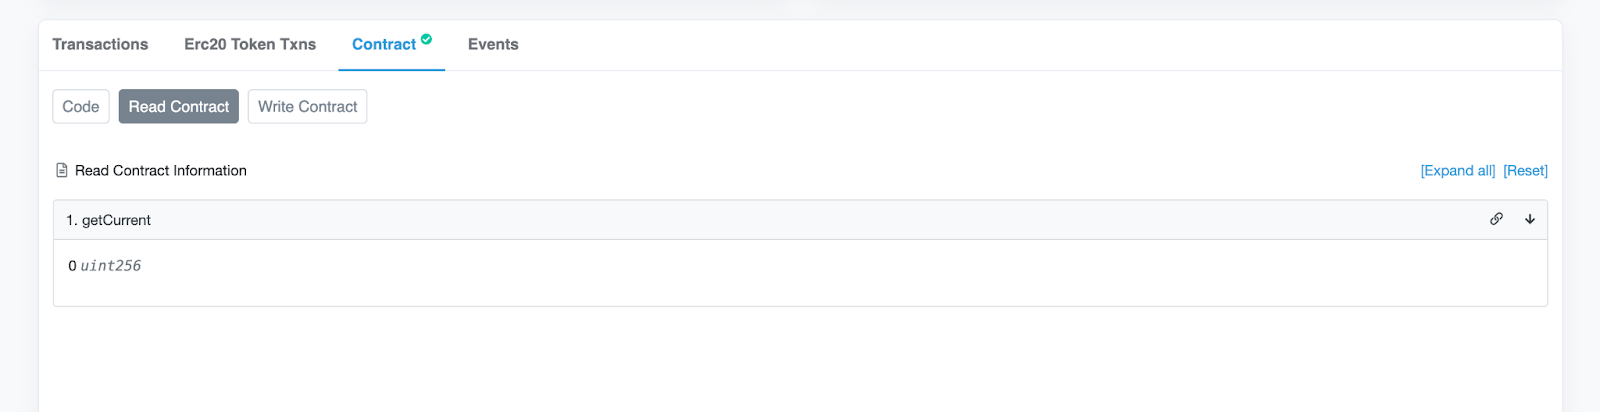
If you click the “Read Contract” button, you should be able to call the “getCurrent” function and see the current value of our counter variable, which is zero by default.
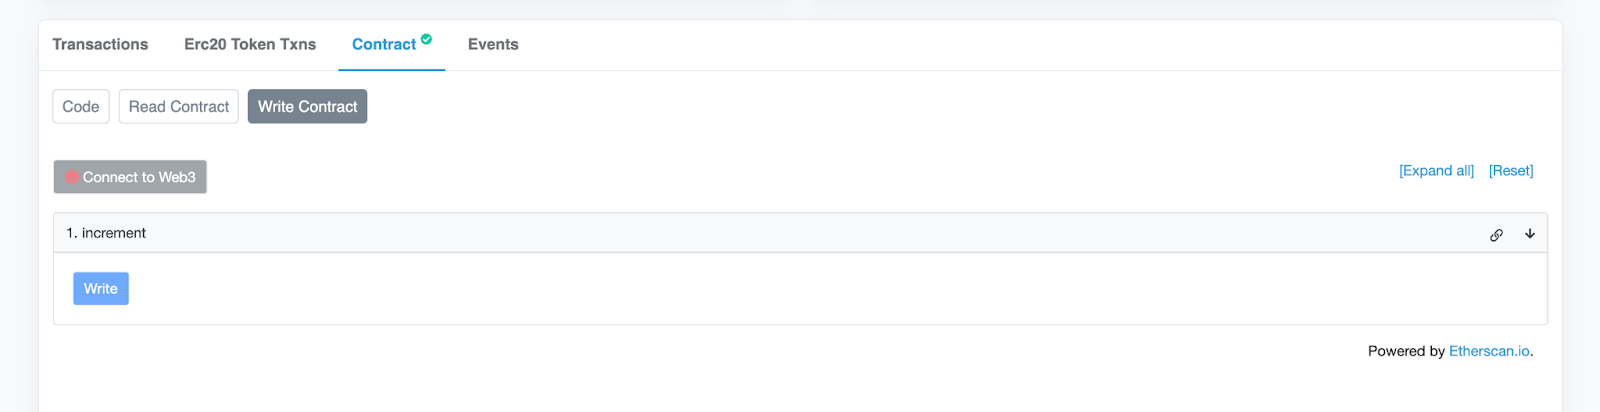
If you click the “Write Contract” button, you should be able to connect your wallet to the Etherscan website and call our “increment” function. After clicking the button, MetaMask will pop up to sign the transaction (remember that you need to be on the Rinkeby network). After your transaction has been successfully included in a block, you can go back to the “Read Contract” section and call the “getCurrent” function again to validate that the “counter” value is now 1.
Verification of Multiple Solidity Files Using Flattener Plugin
We just saw how the verification process for smart contracts works on Etherscan. The example showed us how it can be done for a single Solidity file, which is not always the case. In reality, your smart contract will often import other contracts, interfaces, or libraries.
Let’s use the Chainlink Price Feed Consumer contract as an example. Create a new Solidity file, name it “PriceFeedConsumer.sol”, and paste the following code from the official Chainlink documentation:
// SPDX-License-Identifier: MIT

pragma solidity ^0.8.7;
import "@chainlink/contracts/src/v0.8/interfaces/AggregatorV3Interface.sol";

contract PriceConsumerV3 {
    AggregatorV3Interface internal priceFeed;
    /**
     * Network: Rinkeby
     * Aggregator: ETH/USD
     * Address: 0x8A753747A1Fa494EC906cE90E9f37563A8AF630e
     */

    constructor() {
        priceFeed =
AggregatorV3Interface(0x8A753747A1Fa494EC906cE90E9f37563A8AF630e);
    }

    /**
     * Returns the latest price
     */

    function getLatestPrice() public view returns (int) {
        (
            /*uint80 roundID*/,
            int price,
            /*uint startedAt*/,
            /*uint timeStamp*/,
            /*uint80 answeredInRound*/

        ) = priceFeed.latestRoundData();
        return price;
    }
}
Line “import “@chainlink/contracts/src/v0.8/interfaces/AggregatorV3Interface.sol”;” means that we are importing the Solidity interface from another file. Interfaces are not smart contracts per se, rather they are used to list related methods without a function body implemented. Interfaces are declared by the “interface” keyword. Interfaces can be used to either be inherited by a smart contract that will implement all of the listed methods, or for calling methods of some other contract which have implemented those listed functions. In this example, we are using the latter example to call the “latestRoundData” function on the Chainlink Aggregator contract.
Let’s deploy this contract with the 0.8.7 Solidity Compiler version again. The license is MIT again, which we can see from the first line of our smart contract.
After the successful deployment, navigate back to the Remix IDE file explorer. Find “PriceFeedConsumer.sol”, right-click it, and then click “Flatten”.
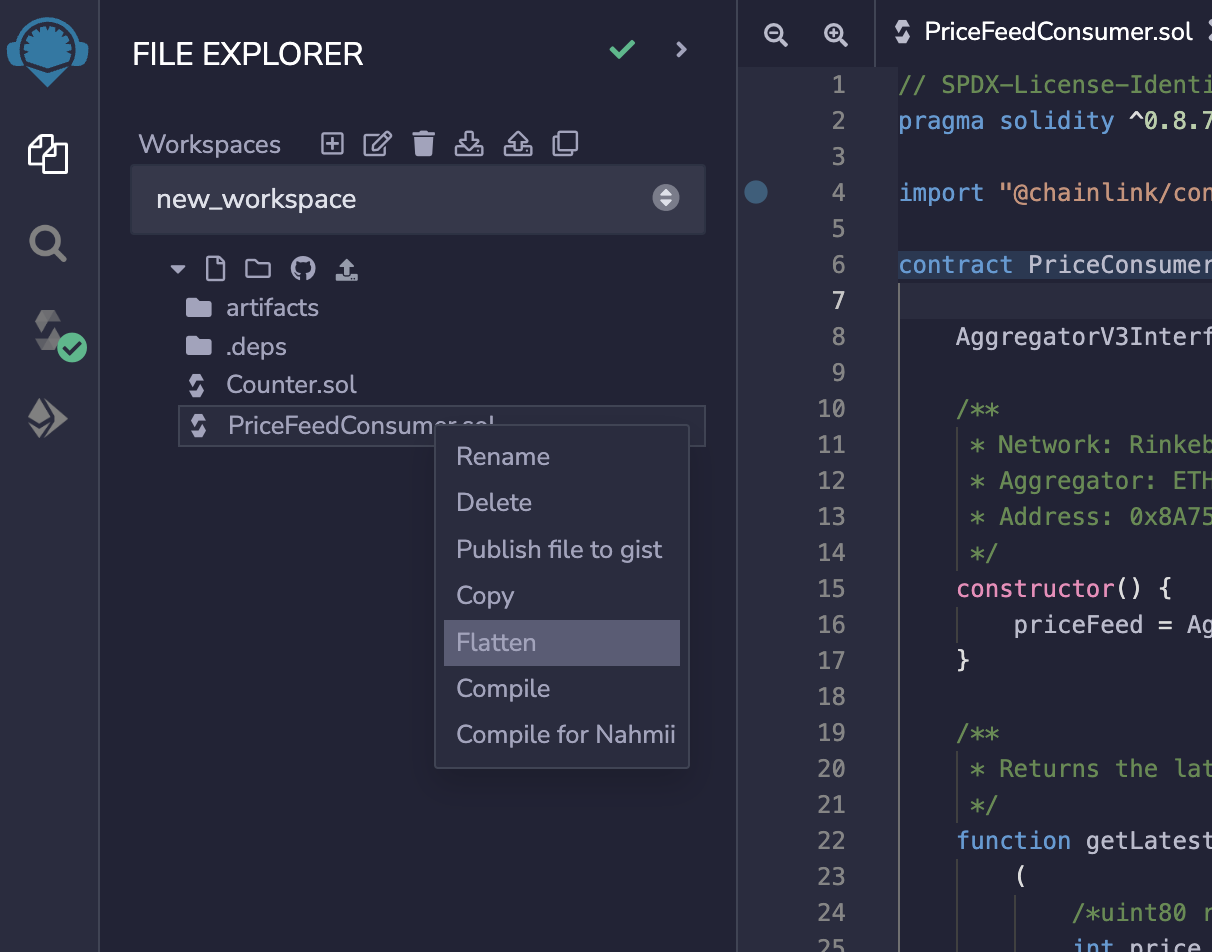
This command will generate the new file called “PriceFeedConsumer_flat.sol” and replace all of the imports with the source code of the actually imported contracts, interfaces, or libraries.
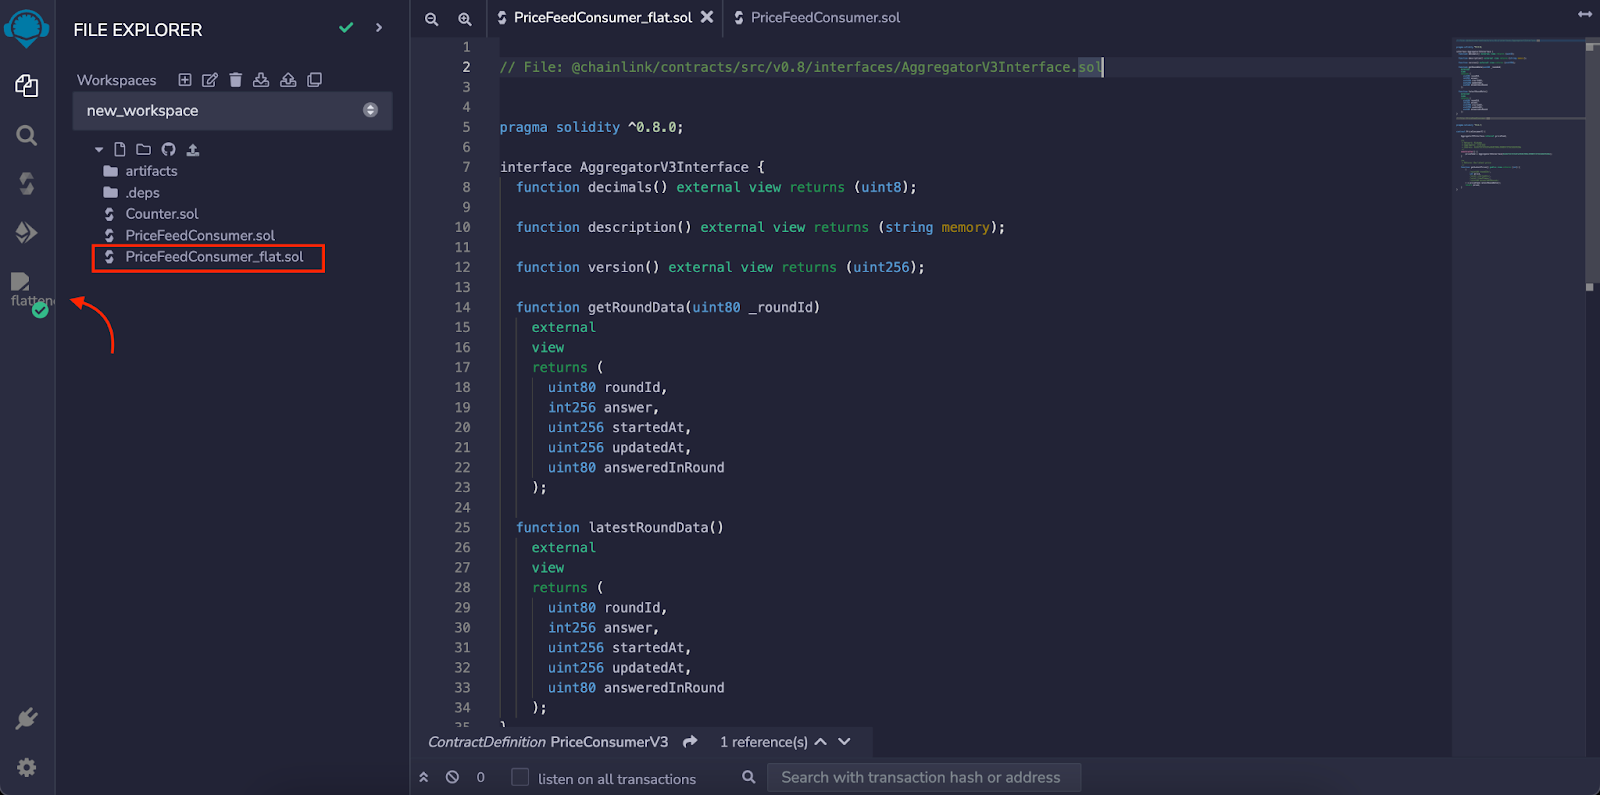
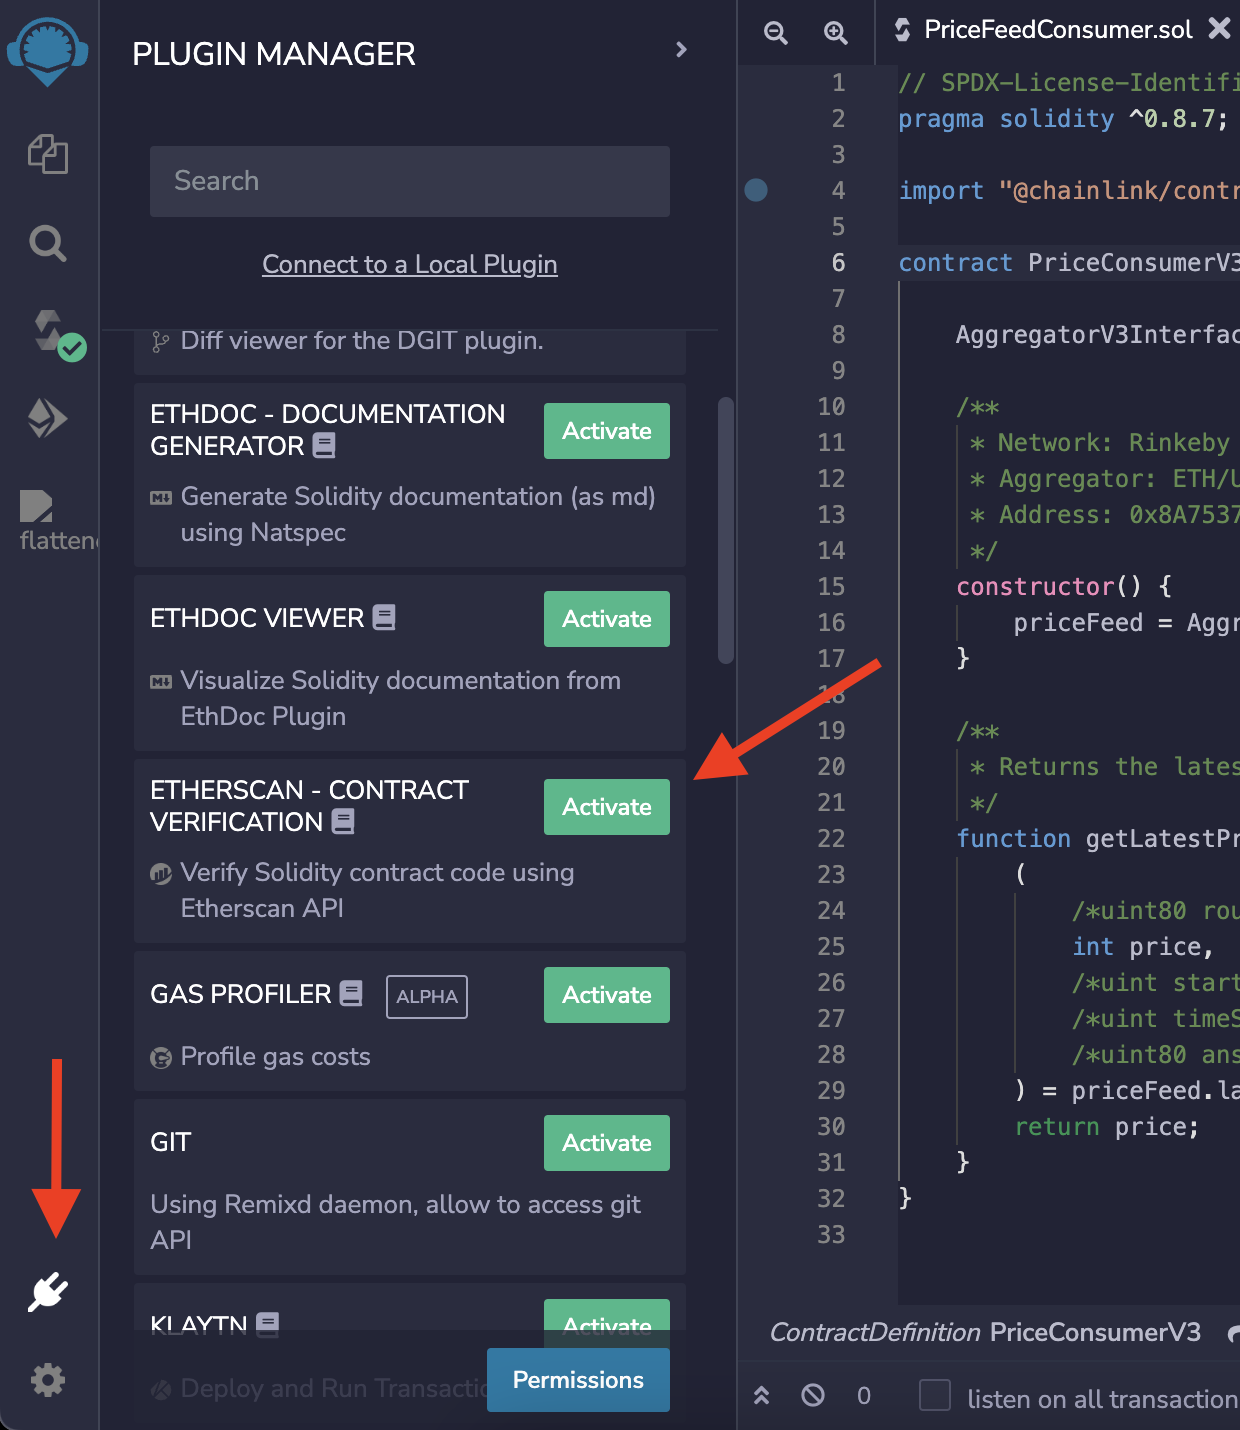
Notice the Remix IDE “Flattener” extension, which automatically activates. The second way to flatten the contract is to activate this extension by clicking the “Extensions” button in the bottom left corner (above the “Settings” button, looks like an electric plug) and clicking the green “Activate” button next to the “Flattener” extension.
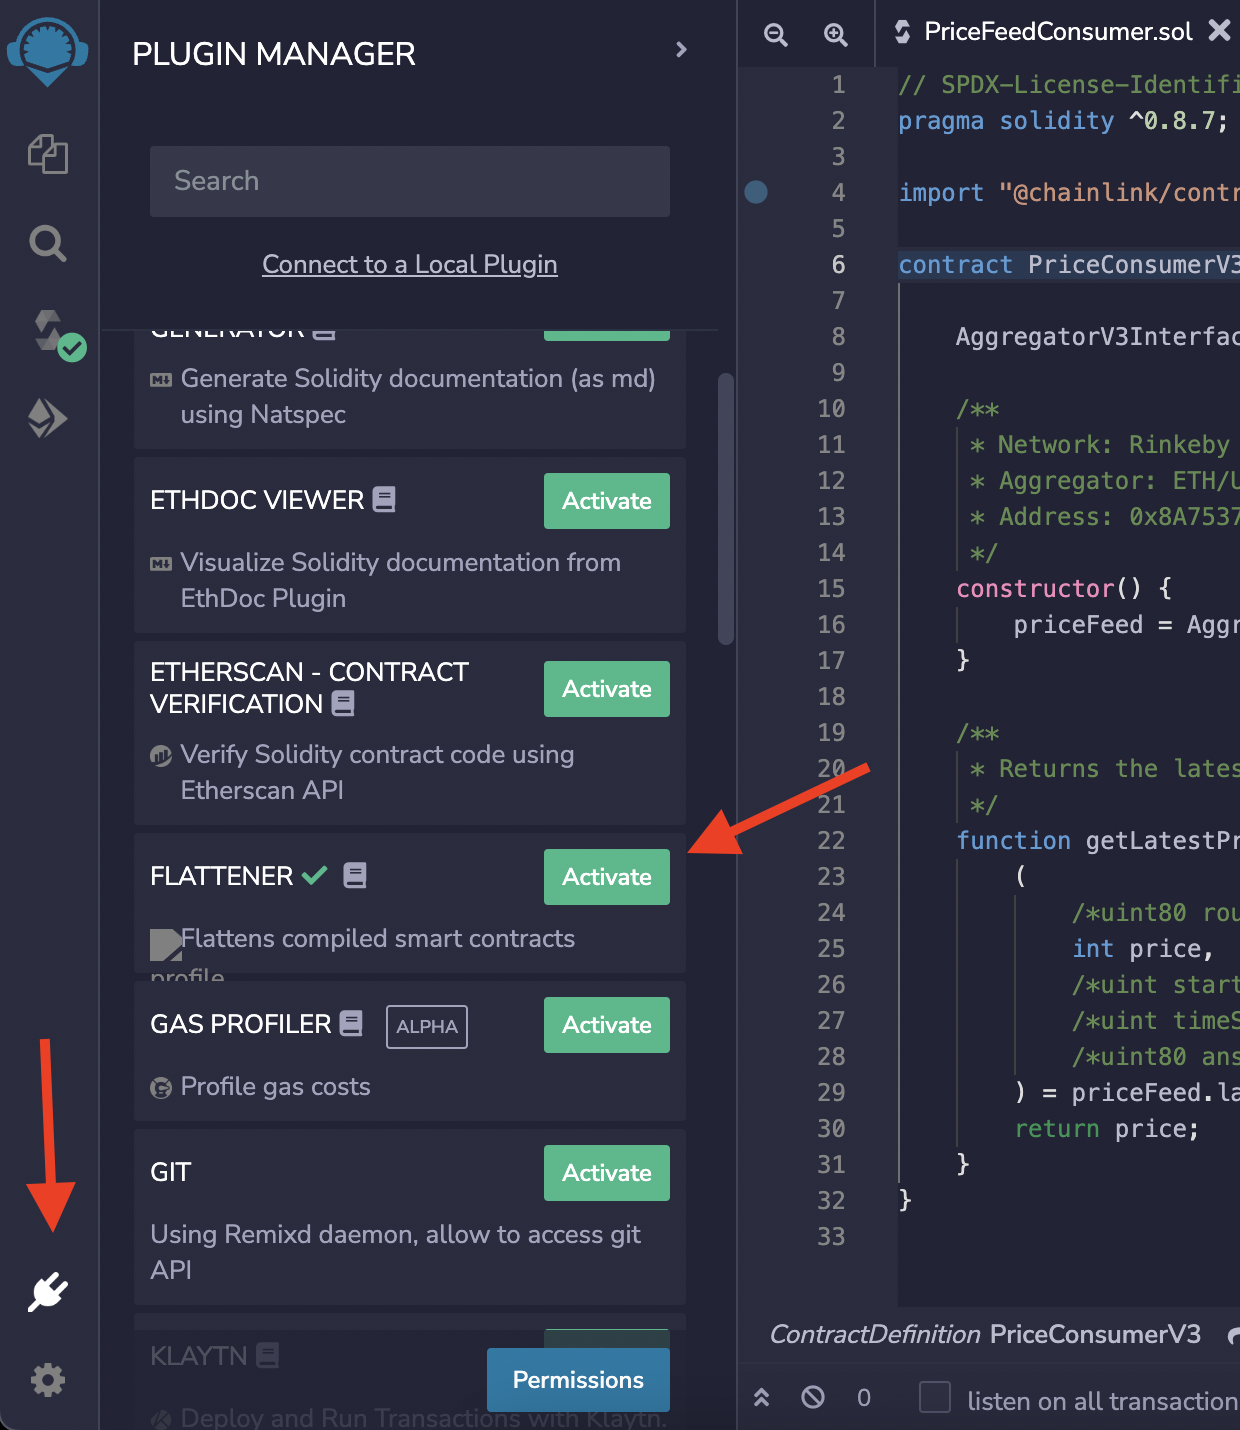
Then, go to the Flattener extension tab and click the “Flatten PriceFeedConsumer.sol” button. Note that this action won’t create the new file, rather it will copy the flattened source code to the clipboard so we can just paste it to the Etherscan verification page.
It’s up to you which of those two approaches for flattening you will choose.
Now, when you go to the Etherscan verification page, as described in the previous chapter, select:
- For Compiler Type — Solidity (Single File)
- For Compiler Version—- v0.8.7+commit.e28d00a7
- For Open Source License Type — MIT License (MIT)
And then click the “Continue” button.
On the following page, inside the “Enter the Solidity Contract Code below” text box, paste the content of either the “PriceFeedConsumer_flat.sol” file or the clipboard, depending on the method you used for flattening the contract.
Again, solve the Captcha and click the “Verify and Publish” button.
Verification of Multiple Solidity Files Using Etherscan Plugin
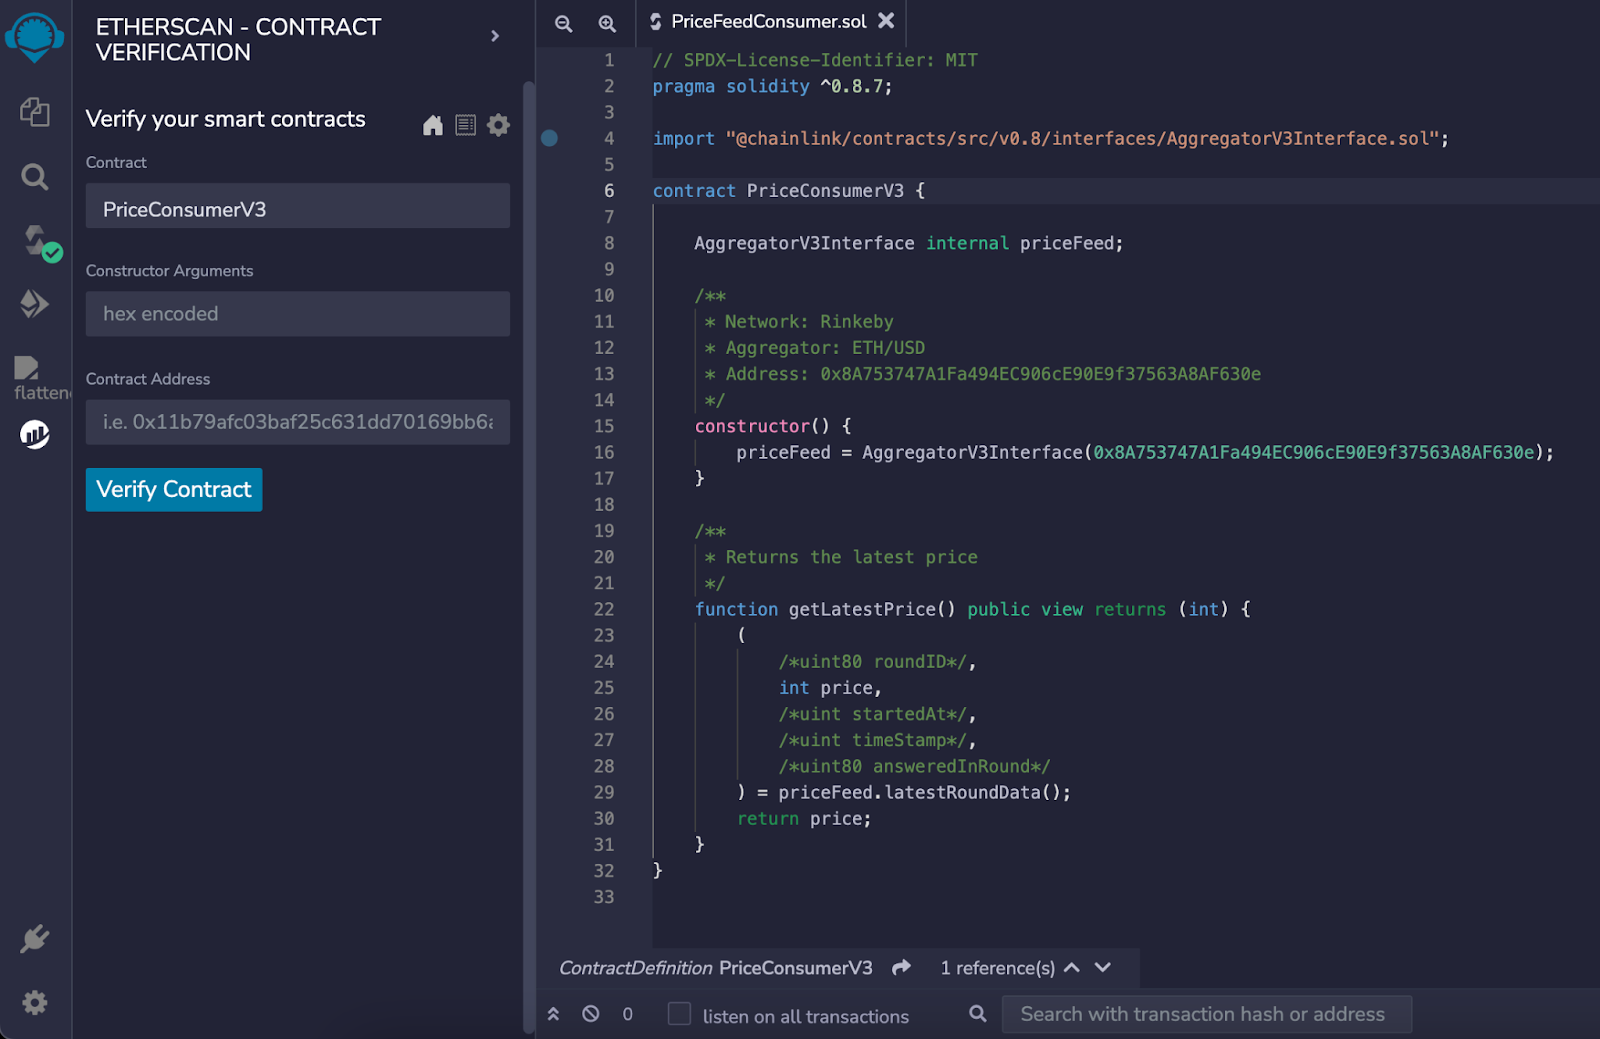
An alternative method for the verification of contracts consisting of multiple Solidity files would be using the “Etherscan – Contract Verification” Remix IDE plugin.
We will use the already written “PriceFeedConsumer.sol” contract. Deploy it once again. After that, activate the “Etherscan – Contract Verification” plugin from the Extensions tab.
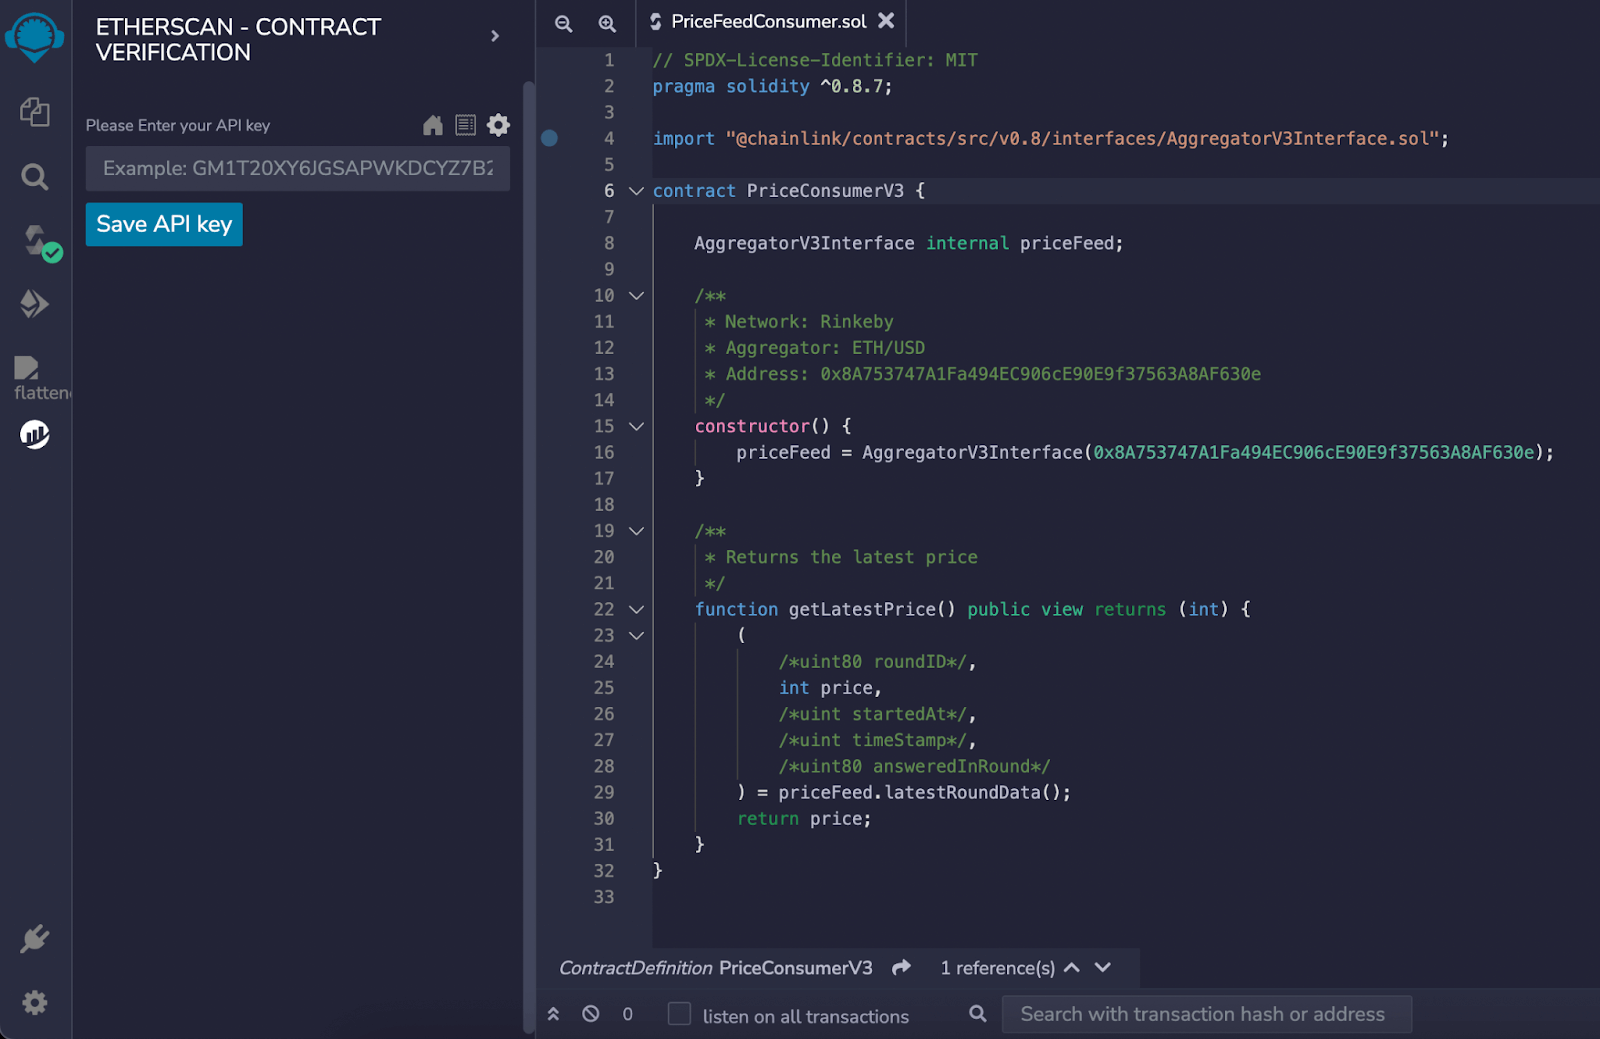
Now go to Etherscan and sign up for an account. Under your account settings, find the “API Keys” section. Generate one API key using the Free Plan.
Then, navigate back to the Remix IDE, click the “Etherscan – Contract Verification” tab and paste your API key there. Click the “Save API key” button.
Then, select the contract you want to verify and provide its contract address. Hit “Verify Contract”. That’s it, your contract should now be verified on Etherscan.
Conclusion
In this article, you learned how to verify smart contracts on Etherscan from Remix IDE using various methods.
Learn more about Chainlink by visiting chain.link or reading the documentation at docs.chain.link.
To discuss an integration, reach out to an expert.


