How To Verify a Smart Contract on Etherscan Using Hardhat
Due in large part to the immutable nature of smart contracts deployed to general-purpose blockchains, security is always the first priority of both users and businesses. For this reason, one of the key steps in smart contract development on Ethereum is Etherscan verification after the initial deployment. Etherscan enables anyone, from users to experienced developers and bug hunters, to check the validity, correctness, and security of your code.
In previous articles, we’ve learned how to Read Smart Contract on Etherscan and how to Verify Smart Contract on Etherscan using Remix IDE. In this tutorial, our goal is to understand how verification can be done using one of the most used smart contract development frameworks—Hardhat.
Let’s get started.
Create a Hardhat Project
Let’s create a new Hardhat project. First, we are going to check the npm version we have installed on our machine. Open your terminal and type:
npm -v
If you don’t have npm installed, follow this guide. Then, enter the following command to install Hardhat:
npm install --save-dev hardhat
If you are using yarn instead of npm, enter:
yarn add --dev hardhat
If you are using Windows, it is strongly recommended to use WSL 2.
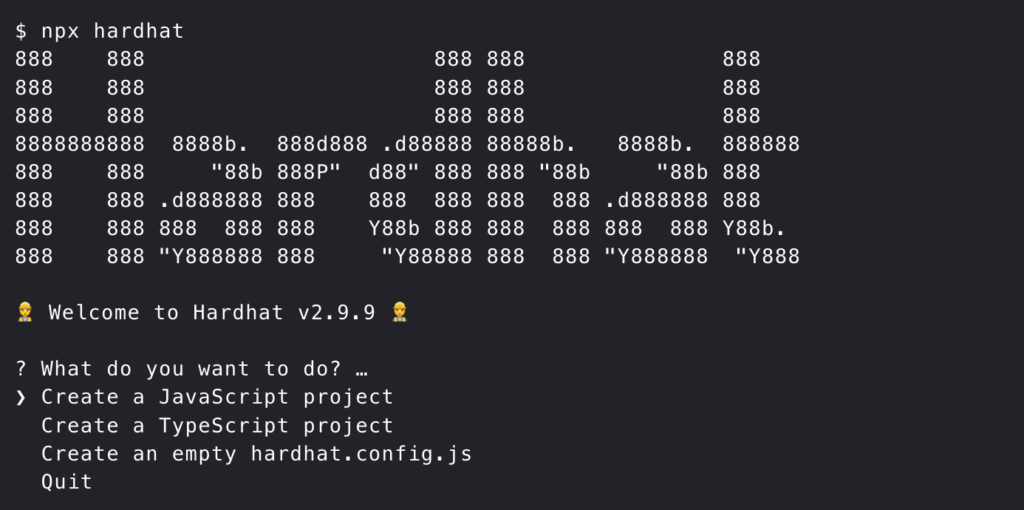
To create the sample project, run the following command in your project folder, then select “Create a TypeScript project”:
npx hardhat
Developing the Smart Contract
If the previous steps worked correctly, you should now be able to see three main Hardhat folders: “contracts,” “test,” and “scripts”. Go to the “contracts” folder, create a new Solidity file, and name it “PriceFeedConsumer.sol”. Then, copy the following source code, taken from the Chainlink Official Documentation.
// SPDX-License-Identifier: MIT
pragma solidity ^0.8.7;

import "@chainlink/contracts/src/v0.8/interfaces/AggregatorV3Interface.sol";

contract PriceConsumerV3 {

    AggregatorV3Interface internal priceFeed;

    /**
     * Network: Goerli
     * Aggregator: ETH/USD
     * Address: 0xD4a33860578De61DBAbDc8BFdb98FD742fA7028e
     */
    constructor(address priceFeedAddress) {
        priceFeed = AggregatorV3Interface(priceFeedAddress);
    }

    /**
     * Returns the latest price
     */
    function getLatestPrice() public view returns (int) {
        (
            /*uint80 roundID*/,
            int price,
            /*uint startedAt*/,
            /*uint timeStamp*/,
            /*uint80 answeredInRound*/
        ) = priceFeed.latestRoundData();
        return price;
    }
}
Now install @chainlink/contracts package by running the next command:
npm install --save-dev @chainlink/contracts
After that, compile our smart contract by running
npx hardhat compile
Option 1: Verify Your Contract Using the hardhat-etherscan Plugin Inside the Deployment Script
With Hardhat, you can verify your smart contracts on Etherscan using the hardhat-etherscan plugin.
To get started, you will need an Etherscan API key. To get one, go to the Etherscan website, create a new account for free and sign in. After that, click the “API Keys” tab. Finally, click the “Add” button to generate the new API key.
We are going to deploy our smart contract to the Goerli test network. If you have never done it before, you may want to know that in order to deploy a smart contract from Hardhat you must provide your wallet’s private key and JSON RPC URL. You can sign up for an Alchemy key for free.
You will also need some test ETH, which you can easily get from the Chainlink Faucet.
Navigate back to your Hardhat project. Modify “hardhat.config.ts” file:
export default {
  // rest of the config
  networks: {
    hardhat: {},
    goerli: {
      url: `https://eth-goerli.alchemyapi.io/v2/${ALCHEMY_API_KEY}`,
      accounts: [GOERLI_PRIVATE_KEY],
    },
  },
  etherscan: {
    apiKey: "ABCDE12345ABCDE12345ABCDE123456789", // Your Etherscan API key
  },
};
Create the new file inside the “scripts” folder and name it “deployPriceFeedConsumer.ts”. The script will deploy the PriceFeedConsumer.sol smart contract, wait for a couple of blocks to be included in the chain due to security reasons, and attempt to verify it on Etherscan.
import { ethers, network, run } from "hardhat";

async function main() {
  const priceFeedAddress = “0xD4a33860578De61DBAbDc8BFdb98FD742fA7028e”;

  const priceFeedConsumerFactory = await ethers.getContractFactory(“PriceConsumerV3”);
  const priceFeedConsumer = await priceFeedConsumerFactory.deploy(priceFeedAddress);

  const WAIT_BLOCK_CONFIRMATIONS = 6;
  await priceFeedConsumer.deployTransaction.wait(WAIT_BLOCK_CONFIRMATIONS);

  console.log(`Contract deployed to ${priceFeedConsumer.address} on ${network.name}`);

  console.log(`Verifying contract on Etherscan...`);

  await run(`verify:verify`, {
    address: priceFeedConsumer.address,
    constructorArguments: [priceFeedAddress],
  });
}

main().catch((error) => {
  console.error(error);
  process.exitCode = 1;
});
Save the file and run the next command from your terminal:
npx hardhat run scripts/deployPriceFeedConsumer.ts --network goerli
Your contract should be now deployed to Goerli testnet and verified on the Etherscan explorer.
Option 2: Verify Your Contract Using the hardhat-etherscan Plugin From Your CLI
We will once again use the hardhat-etherscan plugin to verify our smart contract.
To get started, go to Etherscan and sign up for an account. Under your account settings, find the “API Keys” section. Generate one API key using the Free Plan.
We will once again deploy our smart contract to the Goerli test network. If you need test tokens, visit the Chainlink Faucet.
Modify “hardhat.config.ts” file:
export default {
  // rest of the config
  networks: {
    hardhat: {},
    goerli: {
      url: `https://eth-goerli.alchemyapi.io/v2/${ALCHEMY_API_KEY}`,
      accounts: [GOERLI_PRIVATE_KEY],
    },
  },
  etherscan: {
    apiKey: "ABCDE12345ABCDE12345ABCDE123456789", // Your Etherscan API key
  },
};
Create the new file inside the “scripts” folder and name it “deployPriceFeedConsumer.ts”. This will deploy the PriceFeedConsumer.sol smart contract and wait for a couple of blocks to be included in the chain for security reasons.
import { ethers, network } from "hardhat";

async function main() {
  const priceFeedAddress = “0xD4a33860578De61DBAbDc8BFdb98FD742fA7028e”;

  const priceFeedConsumerFactory = await ethers.getContractFactory(“PriceConsumerV3”);
  const priceFeedConsumer = await priceFeedConsumerFactory.deploy(priceFeedAddress);

  const WAIT_BLOCK_CONFIRMATIONS = 6;
  await priceFeedConsumer.deployTransaction.wait(WAIT_BLOCK_CONFIRMATIONS);

  console.log(`Contract deployed to ${priceFeedConsumer.address} on ${network.name}`);
}

main().catch((error) => {
  console.error(error);
  process.exitCode = 1;
});
Deploy your smart contract using the following command:
npx hardhat run scripts/deployPriceFeedConsumer.ts --network goerli
We will now verify this smart contract on Etherscan from the CLI using Hardhat’s “verify” task. The general syntax of this command looks like this:
npx hardhat verify --network <network> <contract address> <constructor parameters>
We are going to adjust it in the following way:
npx hardhat verify --network goerli <contract address>
0xD4a33860578De61DBAbDc8BFdb98FD742fA7028e
You should be able to see a link to the publicly verified source code of our contract on Etherscan. If you get an error saying that the address does not have bytecode, it probably means that Etherscan has not indexed your contract yet. In that case, wait for a minute and then try again.
Option 3: Verify Your Contract Using the hardhat flatten Task
The third option for Etherscan verification using Hardhat is similar to the verification process through Remix IDE, which is described in one of our previous blog posts.
Once again we are deploying to the Goerli test network, and if you need test tokens, navigate to the Chainlink Faucet. You don’t need an Etherscan API key for this.
Your “hardhat.config.ts” file should look like this:
export default {
  // rest of the config
  solidity: "0.8.9",
  networks: {
    hardhat: {},
    goerli: {
      url: `https://eth-goerli.alchemyapi.io/v2/${ALCHEMY_API_KEY}`,
      accounts: [GOERLI_PRIVATE_KEY],
    },
  }
};
We are going to reuse the deployment script from the previous chapter:
import { ethers, network } from "hardhat";

async function main() {
  const priceFeedAddress = “0xD4a33860578De61DBAbDc8BFdb98FD742fA7028e”;

  const priceFeedConsumerFactory = await ethers.getContractFactory(“PriceConsumerV3”);
  const priceFeedConsumer = await priceFeedConsumerFactory.deploy(priceFeedAddress);

  const WAIT_BLOCK_CONFIRMATIONS = 6;
  await priceFeedConsumer.deployTransaction.wait(WAIT_BLOCK_CONFIRMATIONS);

  console.log(`Contract deployed to ${priceFeedConsumer.address} on ${network.name}`);
}

main().catch((error) => {
  console.error(error);
  process.exitCode = 1;
});
Run the deployment script:
npx hardhat run scripts/deployPriceFeedConsumer.ts --network goerli
If you search for your contract’s address on Etherscan, you will see only the contract’s bytecode when clicking the Contract tab.
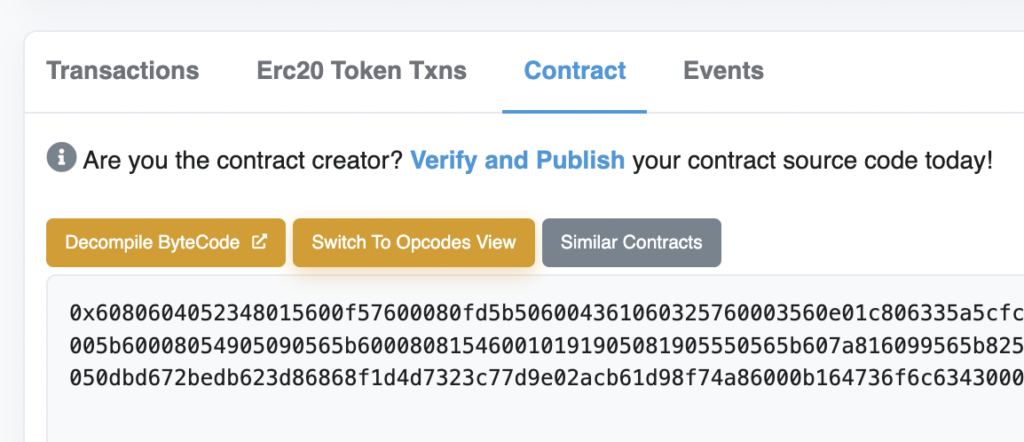
To start with the verification process, click the “Verify and Publish” link. The following page will show up.
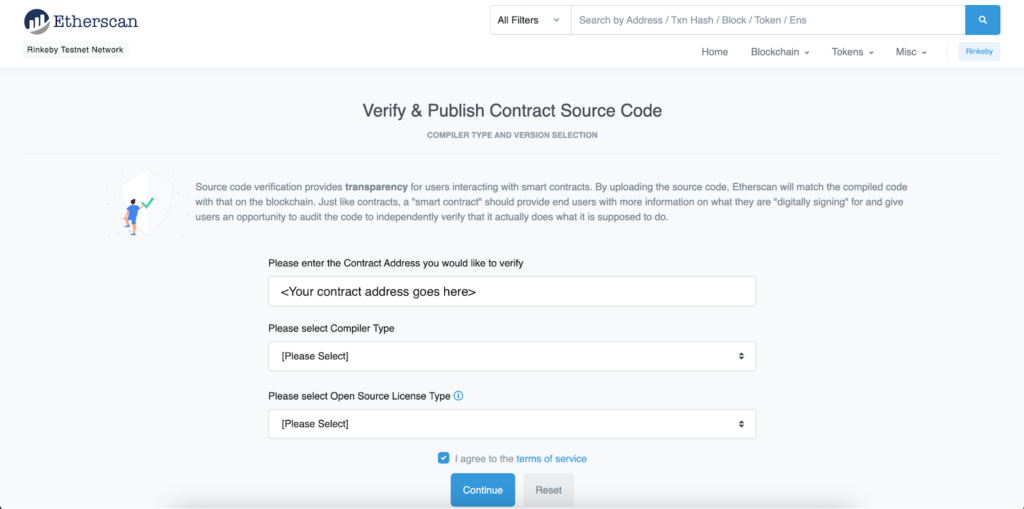
Enter your contract address into the first input field if it isn’t populated by default already.
Then, from the “Compiler Type” dropdown, select “Solidity (Single File)”.
After that, the “Compiler Version” dropdown will show up. Here you need to select the same Solidity compiler version you used for compiling this smart contract before the deployment. If you look back at the “hardhat.config.ts” file you can see that in our case, that was the 0.8.9 version.
Finally, from the “Open Source License Type” dropdown, select the license specified at the beginning of the Solidity file as “SPDX-License-Identifier,” MIT in our case. Click “Continue” to go to the next page.
On the following page you should paste the source code of the smart contract. Unfortunately, if you have imported other contracts or interfaces, as we have, you can’t just copy paste it here. Etherscan needs to know the source code of those imported contracts as well. To achieve this, you need to “flatten” your smart contract by typing the following command:
npx hardhat flatten
The “flattened” version of your smart contract will be printed out in the terminal. Alternatively, you may want to save it in a separate file, which you can accomplish by typing:
npx hardhat flatten contracts/PriceFeedConsumer.sol > cotracts/PriceFeedConsumer_flat.sol
Now you can paste the contract’s source code into the “Enter the Solidity Contract Code below” input box. Then, solve the Captcha and click the blue “Verify and Publish” button. You should be able to see the green checkmark on the Contract tab. This means that you have successfully verified your contract.
Conclusion
In this article, we’ve covered how to verify smart contracts on Etherscan from Hardhat using three different methods. Smart contract verification is one of the crucial steps in the deployment process because it allows the community to check out the source code before using it.
Learn more about Chainlink by visiting chain.link or reading the documentation at docs.chain.link. To discuss an integration, reach out to an expert.


